Popplet Comments lets you add extra information in text form to individual popples, storing this information discretely behind the main popplet board and adding a whole new dimension to your collaborative work.
Like all things Popplet, this feature is simple and powerful. It is also remarkably versatile and can be advantageously employed in many different situations. Discover how to make your Popplets better and more accessible to others by simply adding comments. Take a look at some of the things Popplet users are doing:
- Hold onto thoughts or ideas that you aren’t quite ready to let go of – could be a whole other Popplet!
- Prevent Popplets from becoming cluttered by storing stuff as comments.
- Take notes: in class, during meetings, anywhere…connect notes to visuals.
- Create creative text, while using photos or images as visual cues for inspiration.
- Add research notes to your Popplet work, which can then be shared.
- Show your working, shed some more light on your process.
- Work together,collaborate on projects/homework.
- Real time communication in group/classroom work.
How to Add Comments
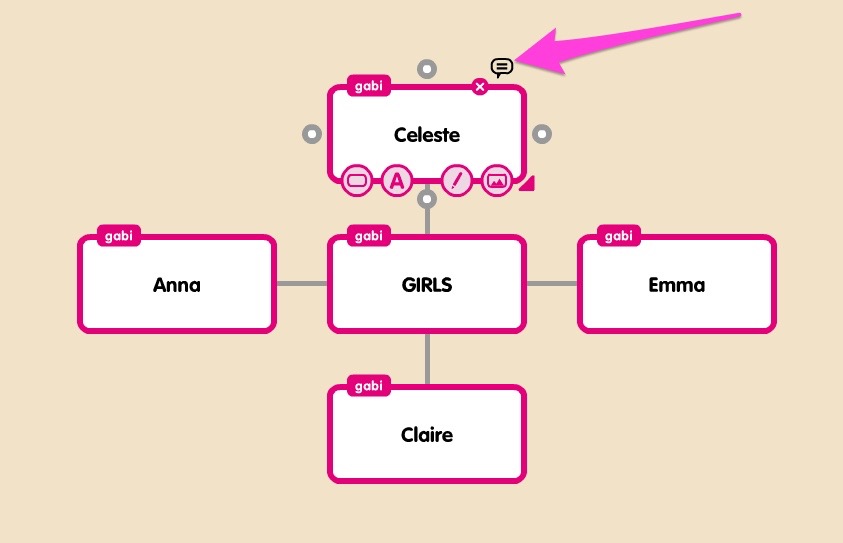
To activate comments all you have to do is select a popple to highlight it, then click on the black comment bubble that sits just above the top right hand corner:
Your popplet then disappears – don’t worry, it’s still there, this is just to let you to focus on your comments; give them the attention they deserve. Now you should see something like this:
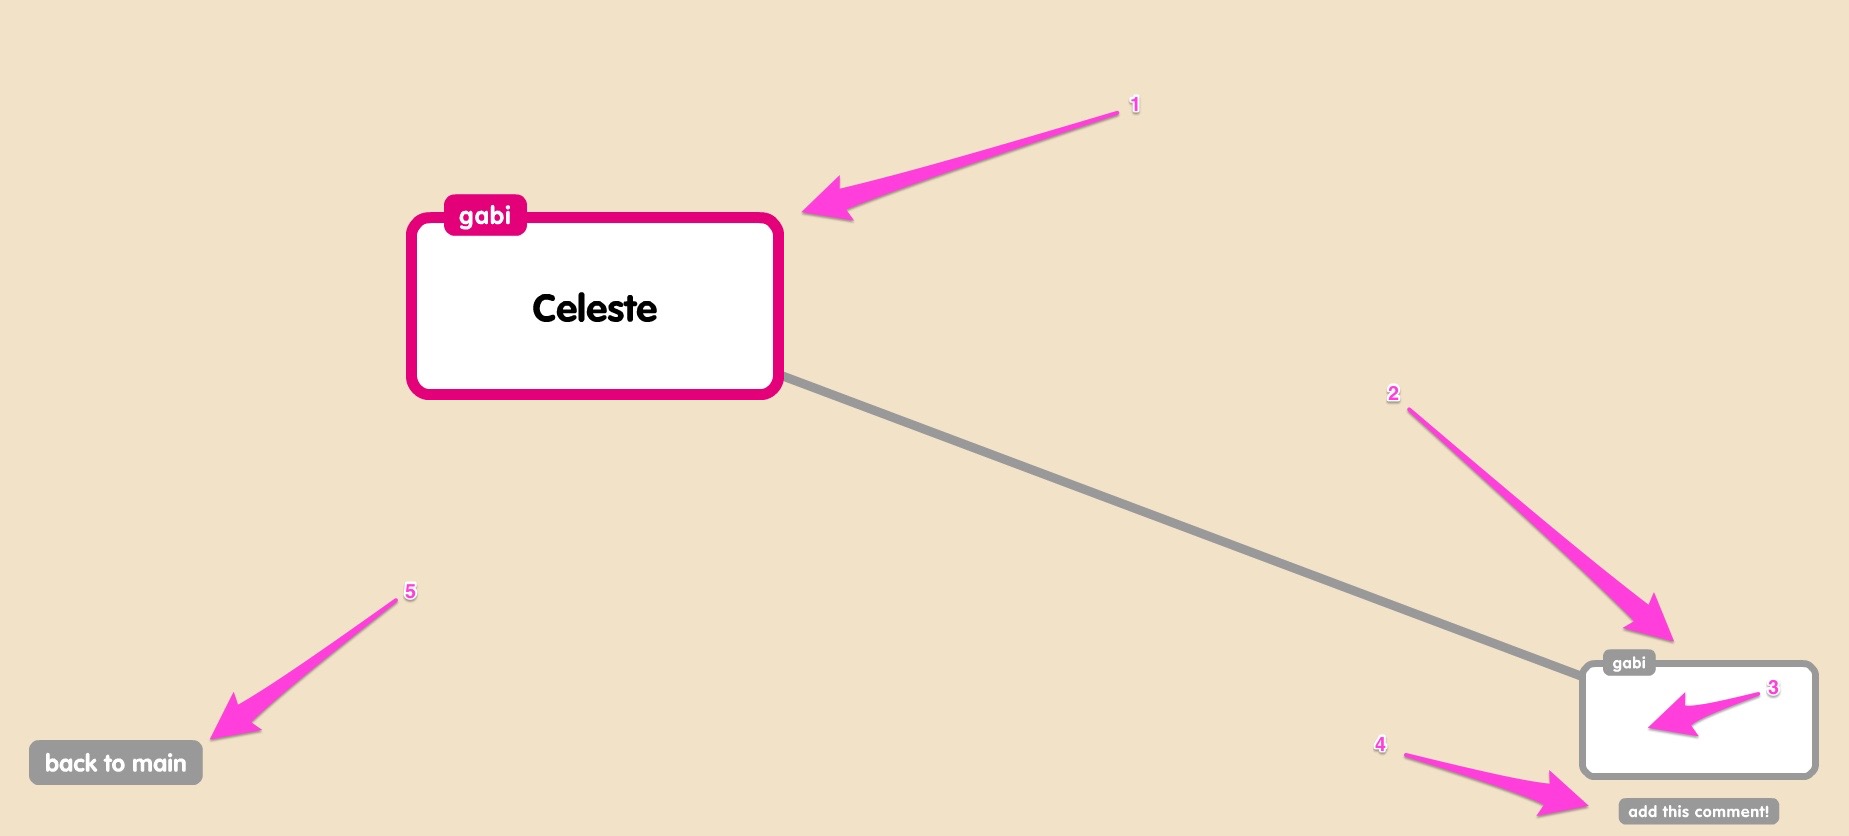
- The popplet you wish to add the comment to is still visible (Celeste in the above example)
- Connected to this, there is an additional, grey comment popple
- Add your comment to the comment popple
- Then click on add this comment!
- Finally, click on back to main to return to the main Popplet.
Your comments will not be visible in the main popplet, but you can refer to and edit them at any time by clicking on the comment bubble.
Collaborating With Comments
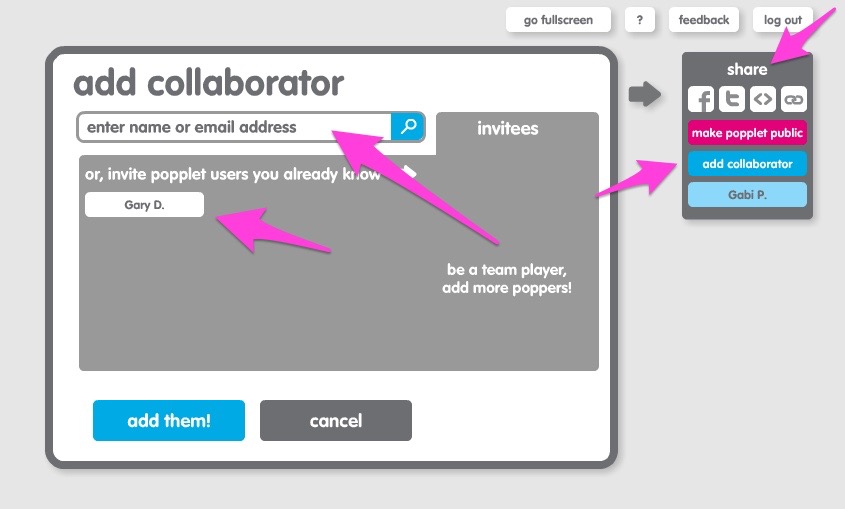
An unlimited number of collaborators can work on a Popplet at the same time, and with Popplet Comments, everyone can have their say. Adding collaborators to a Popplet is easy: when creating the Popplet, simply click on the share button, then choose add collaborator, enter the email address of the person you wish to collaborate with, then click add them! Now you are ready to start talking.
Collaborators can add comments to a Popplet, additionally the Popplet creator can give permission for collaborators to edit a Popplet, by selecting labs from the cog menu, clicking on popplet permissons then choosing popples can be edited by any collaborator: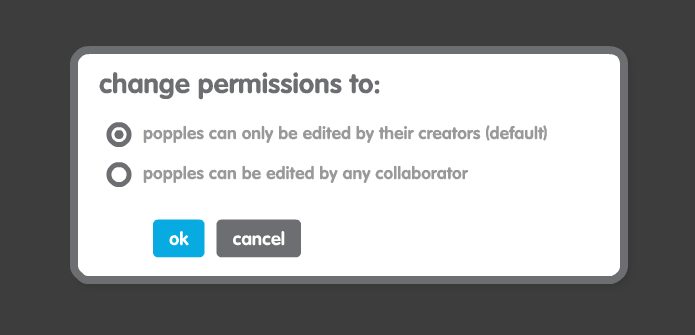
Be careful before you give someone permission to edit your Popplets, they will be granted the same access as you, and they might make changes you don’t like. Make a copy of your Popplet, just in case.
Conversations on Popplets can take many forms: projects, interest groups, homework assignments…below is an example of a conversation between a couple who are choosing a name for their new baby – gender unknown obviously!
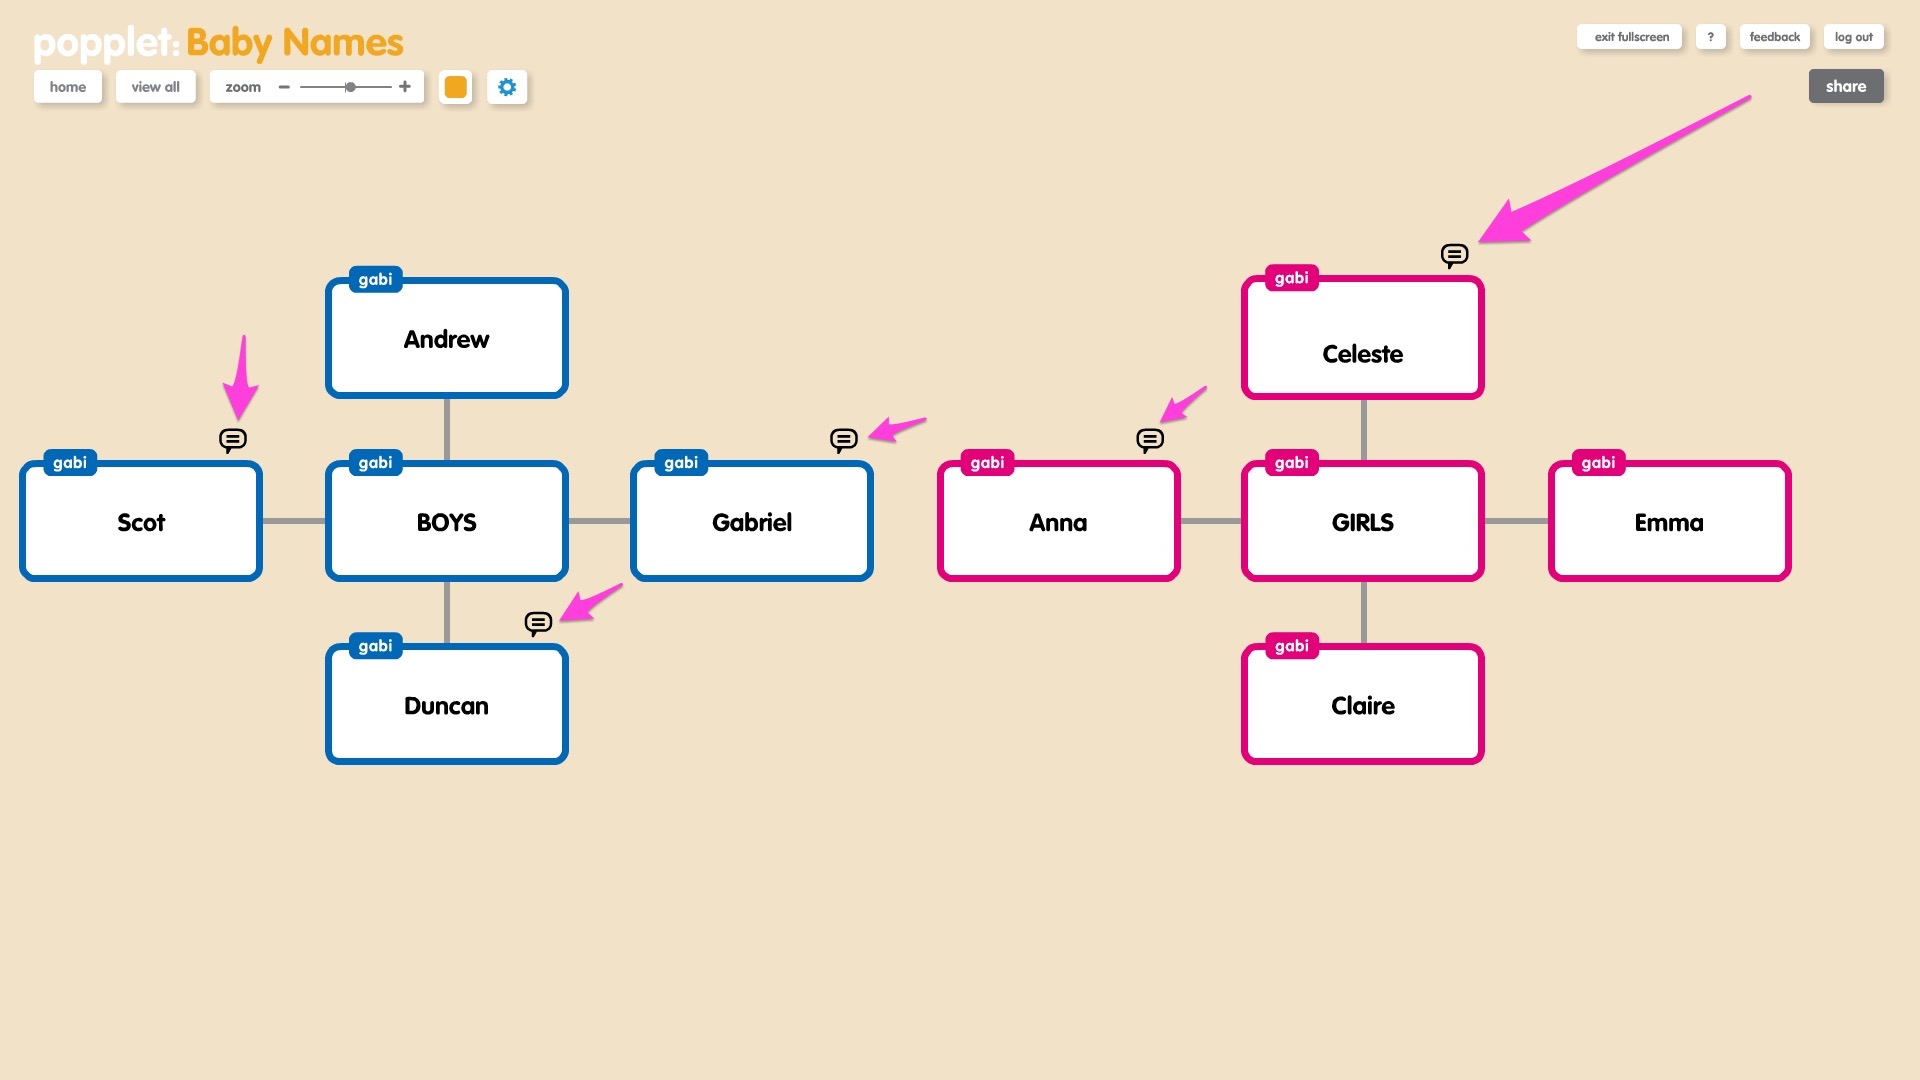
As you can see, boys’ names are in traditional blue and girls’ names are in a pretty shade of Popplet pink. Note that some of the name popples have a comment bubble visible, indicating that comments have been added. Take a look at what happens when we click on Celeste’s comment bubble:
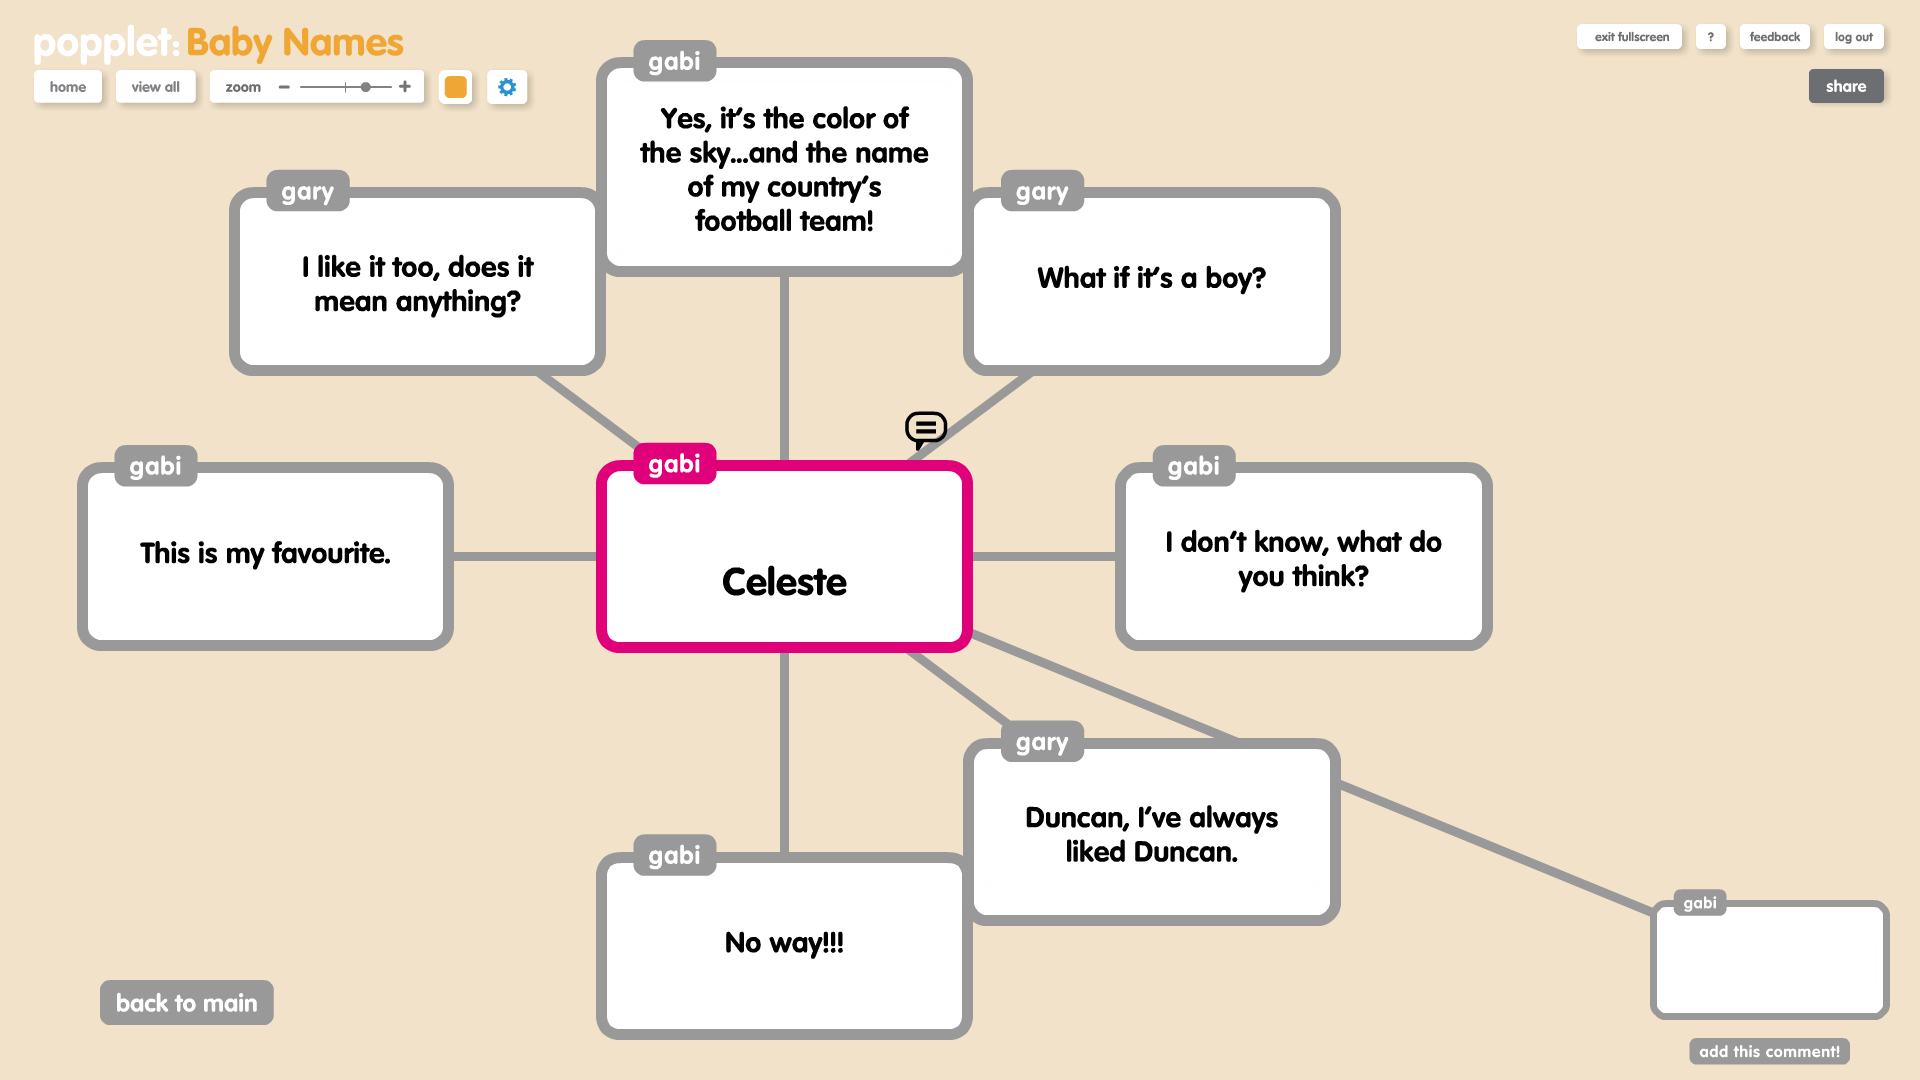
A whole Popplet conversation is revealed. Comments are added clockwise with name tags to identify who said what. Comments are added instantly, and real time communication is possible.
Additional Information
- Remember, comments are not visible in the main popplet, and can be accessed by clicking on the comment bubble.
- Unlike in main popples where URLs are added as clickable links, in comments popples, URLs are added as text and must be copied and pasted into a browser
- Multiple comments can be added to a single popplet – a new comment bubble opens each time you click add this comment!.
- When in the default setting “popples can only be edited by their creators”, a comment can only be deleted by its original author.
- In the setting, “popples can be edited by any collaborator”, any collaborator can delete any comment.
- To remove unwanted comments, change permissions to “popples can be edited by any collaborator”, remove the comment, then change back.
- It is possible to hide the name tags on popples by clicking on the cog menu, selecting view, then choosing hide name tags. This is not advised when collaborating on Popplets.
We learned a lot from this tutorial, did you? As always though, the surest way to get comfortable with comments on Popplet is by experimenting yourself, so don’t hesitate to try out what you have learned! Did we miss anything? Do you have other ways to make use of comments with your Popplets? Share your experiences with us, and our community on Twitter and on our Facebook page.