Welcome to Popplet Formatting Techniques, the place to be if you are interested in learning the art of efficient and elegant popplet creation.
The series so far…
- Selecting Popples and Multiple Actions: Learn how to copy and paste a single popple or dozens of popples, and perform editing and formatting actions such as changing text size and color on lots of popples at the same time
- Getting Organized With Popplet Stacks: Discover how the make row/column and align horizontally/vertically features can be used to free up space while working on a busy popplet board.
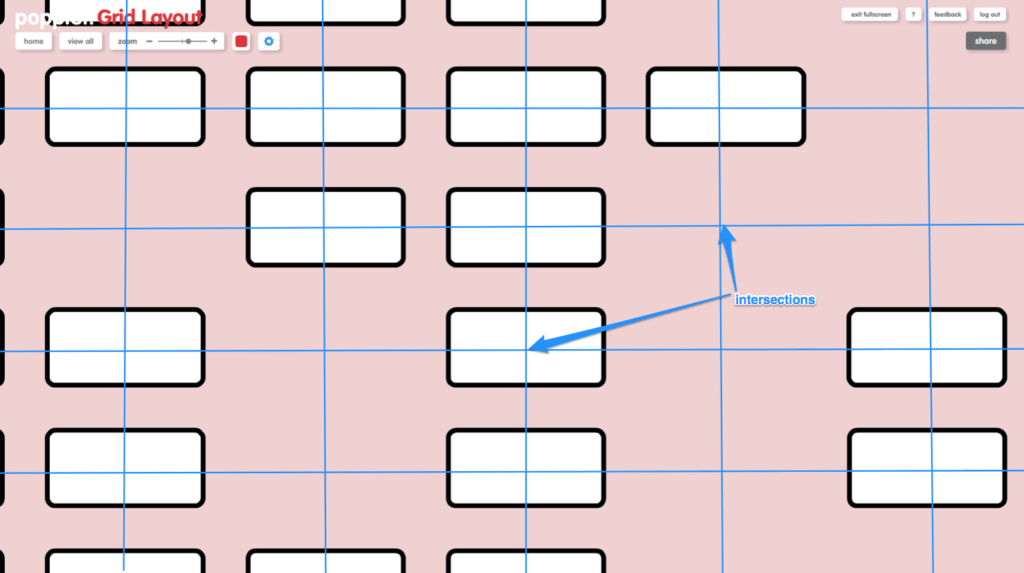
Most popplet formatting tools can be accessed by clicking on the cog menu and selecting organize as shown in the image below:

The final three tools in this menu are the snap to grid tools, which can be used to format popplets in a grid layout.
Formatting Popplets in a Grid Layout
When you first go to work on a brand new popplet, popples of almost limitless size can be positioned anywhere on an almost infinite popplet canvas, and this is how it should be when it comes to mind-mapping. Sometimes, the popples on a busy board even seem to seem to take on a life of their own; a possible plus for the creative process but maybe a drawback when trying to express ideas elegantly and efficiently, or creating presentations. To restore order, most popplet formatting tools and techniques tend towards formatting popples in a grid layout. These include the tools we looked at in the previous tutorial:
- make row/column
- align horizontally/vertically
And the tools we will look at in this tutorial, the snap to grid tools:
- turn autosnap on/off
- snap all to grid
- snap selected to grid
This handy trio can be used to quickly create popplets (or parts of popplets) with neat 2-dimensional layouts.
THE INVISIBLE GRID
When popples are formatted in a grid layout in snap to grid mode popples position themselves relative to the points on an invisible grid. These points are represented by the intersections between the blue lines in the diagram below,
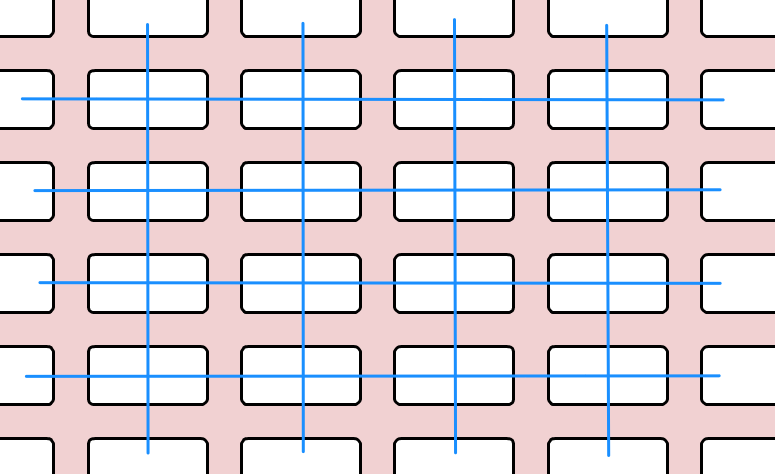
Popples position themselves centrally at the nearest intersection, not the nearest popple:
turn autosnap off
This is Popplet’s default setting, and all popplets created have the autosnap feature deactivated until it is activated by selecting turn autosnap on from the organize menu. You can place popples wherever you want on a popplet board. A fresh popple will appear on precisely the spot you double-click, and it will stay put until you choose to move it, moving to exactly where you want it to go:
This is how most popplets are made, and this mode works best for creative work and brainstorming, where the final layout of the poppet is still a mystery.
turn autosnap on
Sometimes, especially when working on a big popplet with a lot of information, or when you already know, or have a good idea of what your finished popplet is going to look like, it’s a good idea to activate autosnap before you start. With autosnap switched on, popples behave a little differently, automatically positioning themselves into a grid pattern, lining up like soldiers on parade. Check out this fine display:
Remember that autosnap can be activated or deactivated at any time by clicking turn autosnap on or turn autosnap off in the organize menu.
All popples are created equal, and all new popples remain the same size until changed. In autosnap mode, different sized popples can be contained in a grid layout. Take a look at this popplet created with autosnap activated:
Different sized popples can be used in both autosnap on and autosnap off modes. If autosnap is activated popples will always align their center points relative to the intersections on the invisible grid described above.
snap all to grid
If your popplet work needs a bit more freedom than autosnap offers, you can always create your popplet first then apply stricter formatting later. By selecting snap all to grid from the organize menu, all the popples on a popplet board immediately reorder themselves smoothly into a grid layout:
BEFORE

AFTER
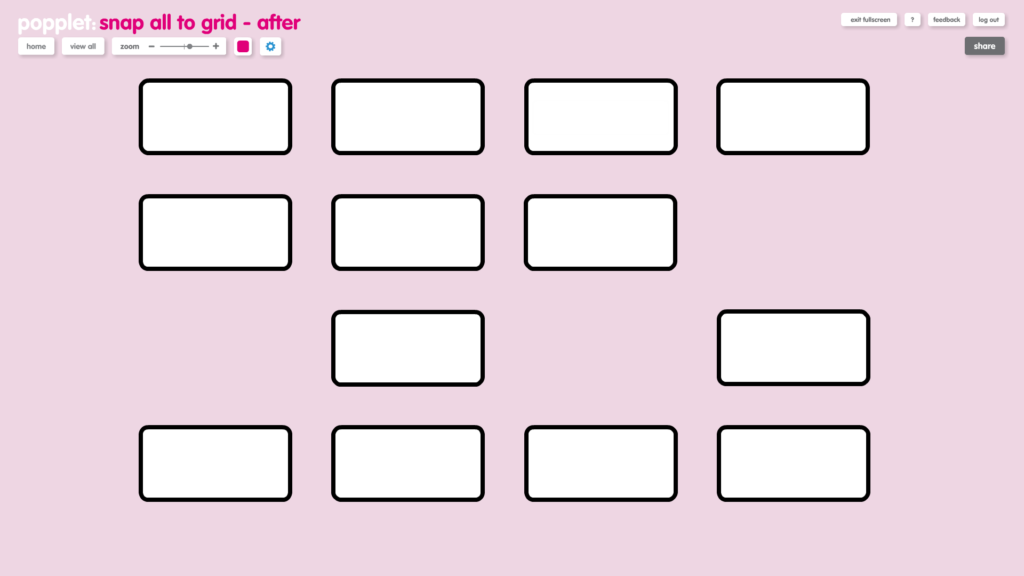
Be careful! Some popples find their geometrical destinies beneath other popples of similar size and can end up hidden from view. So if you notice that some of your popples have disappeared after activating snap all to grid, check beneath the popples you can actually see, where they will almost certainly be hiding!
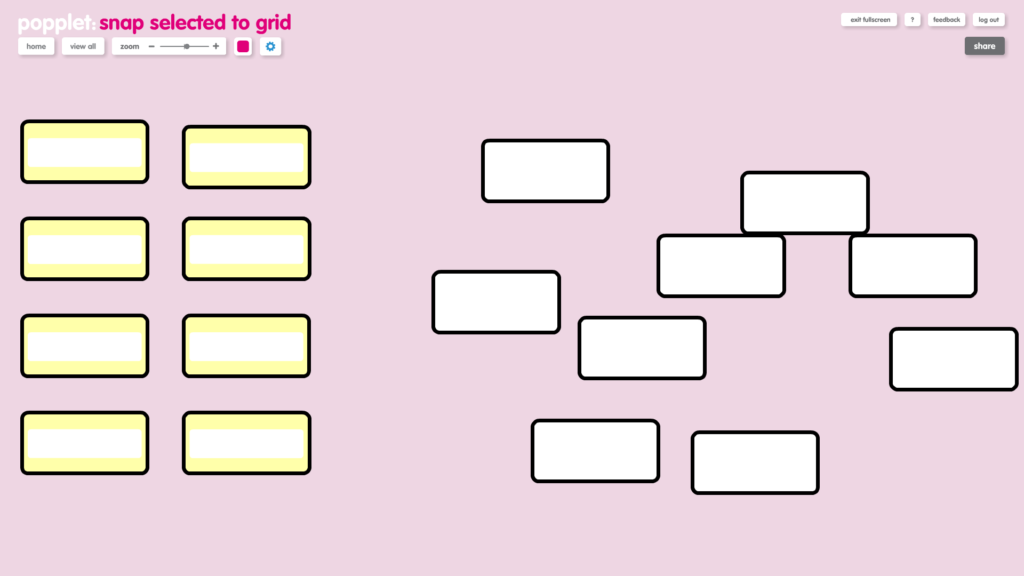
snap selected to grid
This feature works just like snap all to grid except that only selected popples will form a grid layout.
- First, select the popples you want to snap to grid by holding down the shift key and either clicking inside individual poppies or dragging with the mouse
- Then, click snap selected to grid and the selected popples will reorder themselves into a grid layout:
Once the selected popples are deselected, they will revert to autosnap off mode.
How strictly you control your popples depends entirely on what it is you want your popplet to become. Sometimes a little guidance is the order of the day, other times it’s best to trust to instinct, and let the popples fall where they may. One thing is for sure: Equipped with a little Popplet formatting knowledge, great ideas can be expressed, worked on, and shared.
How have you been using Popplet Formatting Techniques? Share your ideas with the Popplet community on our Twitter and Facebook page.