Popplet is efficient, fun and simple to use. So simple, and so much fun that before you know it, even the best intentioned of popplet boards can quickly become cluttered and a little unmanageable. And as the fun of adding more and more information takes hold, popples might just start to get a touch unruly. Not to worry! Most of the time order can be quickly restored to a popplet board by employing simple formatting techniques such as:
- Creating additional popplets, and using Popplet Linker to connect them.
- Adding textual information to Popplet Comments, clearing space on the main board.
- Making Popple Stacks using the formatting tools located in the organize menu to cleverly create the temporary space big enough to hold all of your ideas
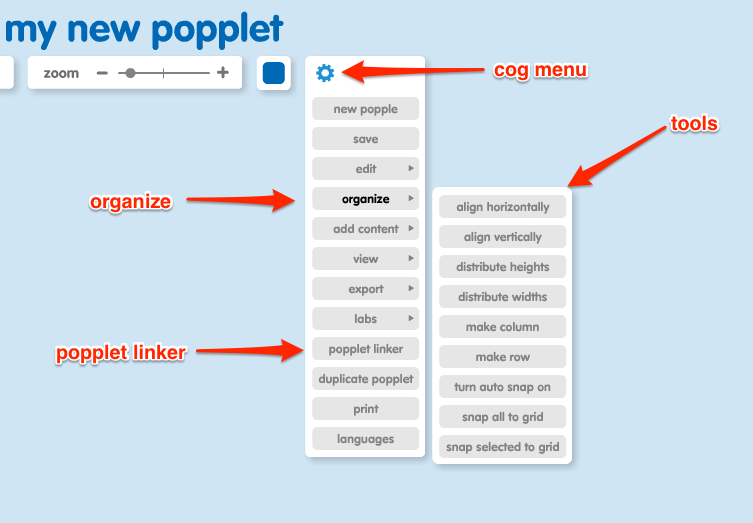
The popplet linker is located in the cog menu, and you can learn more about popplet comments by taking a look at our previous tutorial article. To create a popple stack will need the tools located in the cog menu.
Creating a Popple Stack
A popple stack is a bunch of popples grouped together so that only the contents of the top popple are visible – the other popples are stored intact below. Storing popples this way temporarily allows you to make space on a popplet board so you can add more popples, or edit and format more freely. To understand how to make a popple stack, we need to take a quick look at the align vertically/horizontally tools.
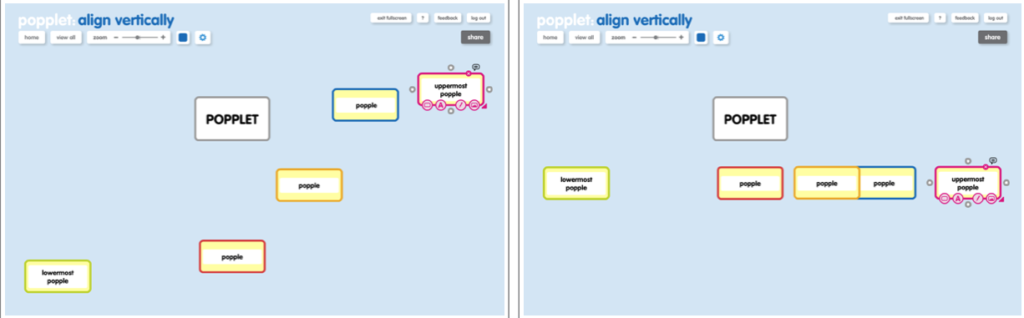
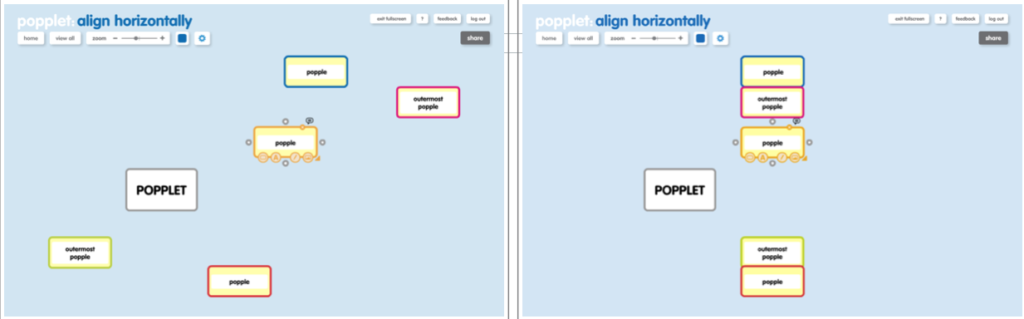
ALIGN VERTICALLY
- Select the popples you want to align (selected popples turn yellow),
- Then click align vertically
- The selected popples shift vertically to form a row at the midpoint between the two outermost popples:
ALIGN HORIZONTALLY
- Select the popples you want to align (selected popples turn yellow)
- Then click align horizontally
- The selected popples shift horizontally to form a column at the midpoint between the two outermost popples:

So, if you select multiple popples, then select align vertically immediately followed by align horizontally (or vice versa ) the result is a popple stack.
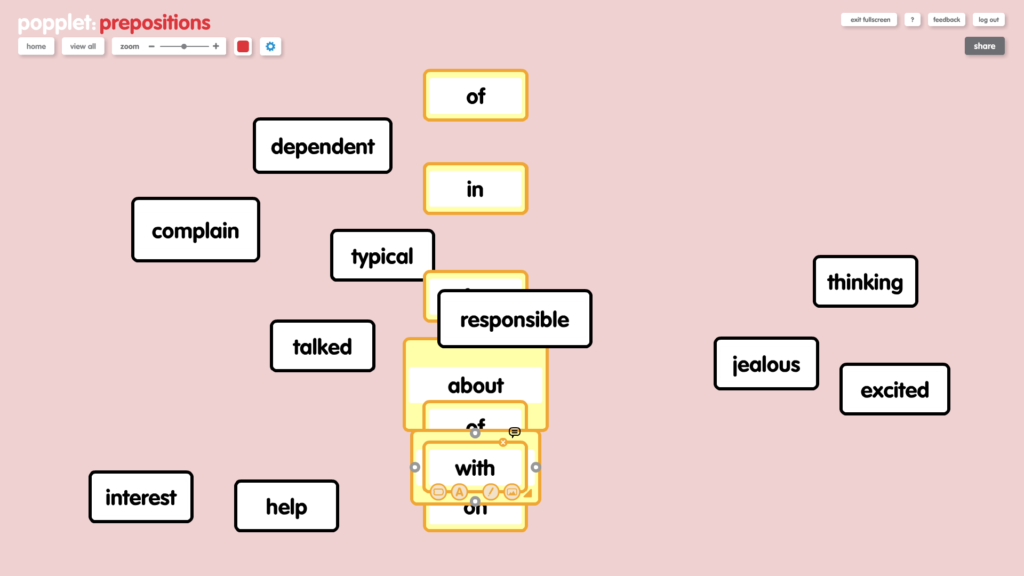
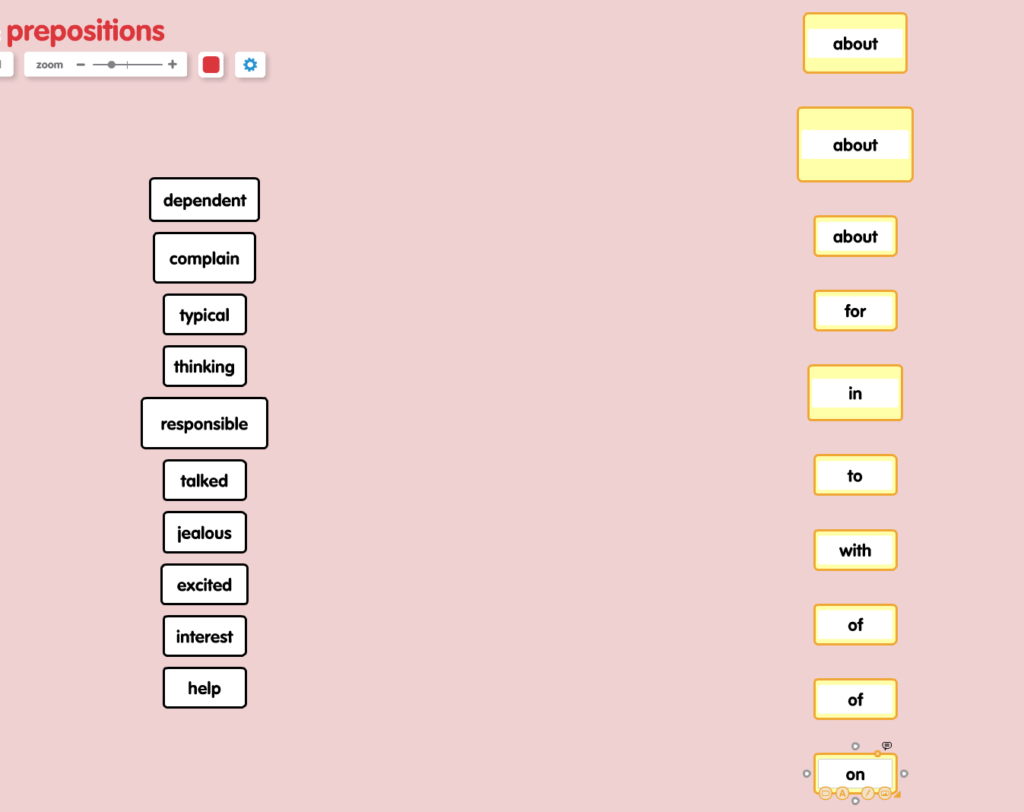
Take this rather messy looking prepositions popplet for example: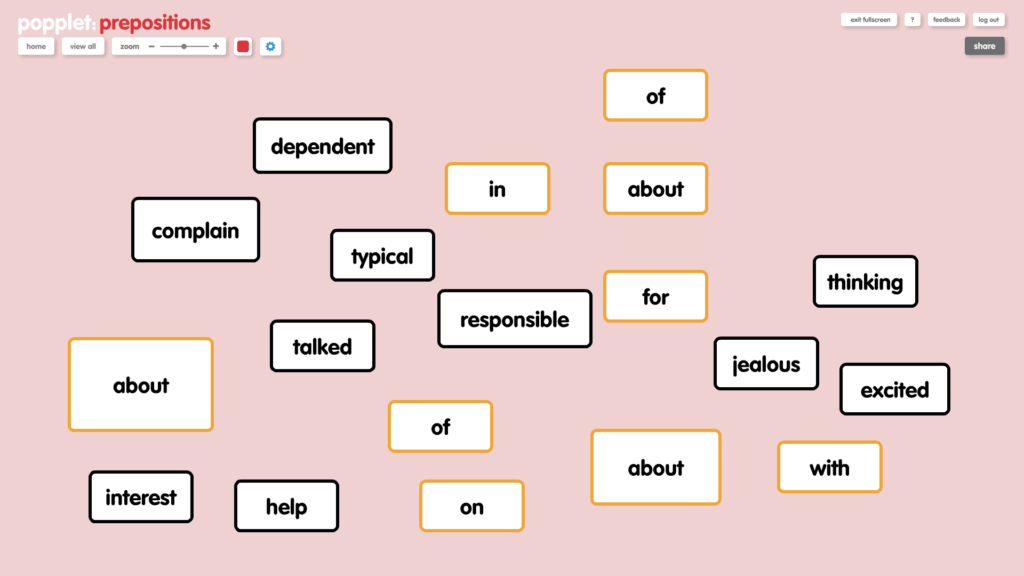
It’s ok, but what we really want to do is to match the base words (black) with their propositions (yellow). We need some space to work in and we also want our finished popplet to look good. So let’s make a popple stack:
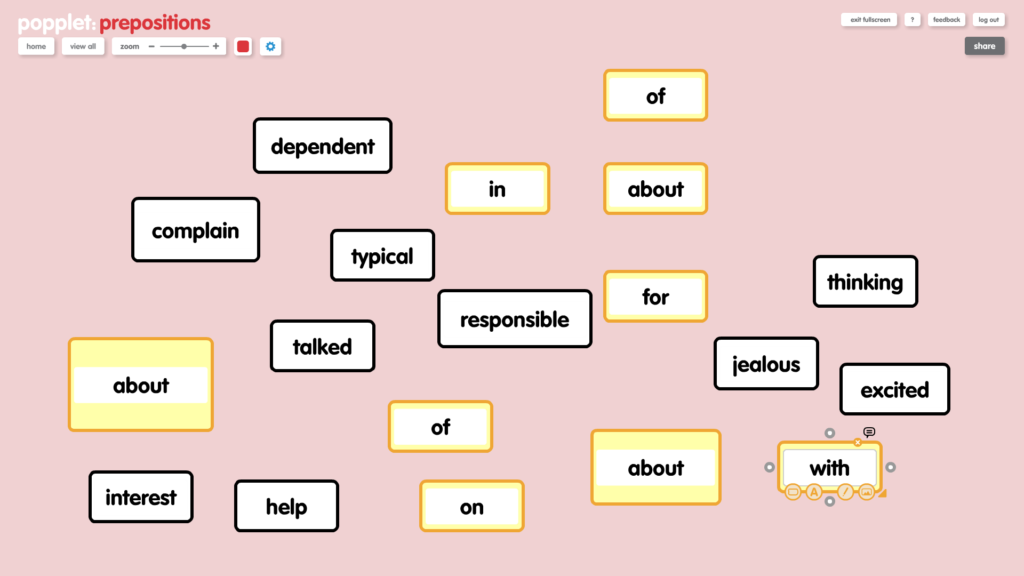
- Begin by selecting all the preposition popples by holding down the shift key while clicking inside the popples:
- Next, select align horizontally from the cog menu:
- Then, making sure the popples remain selected, click on align vertically. The popples will draw together into a neat stack, which can be dragged to a corner of the board until needed:
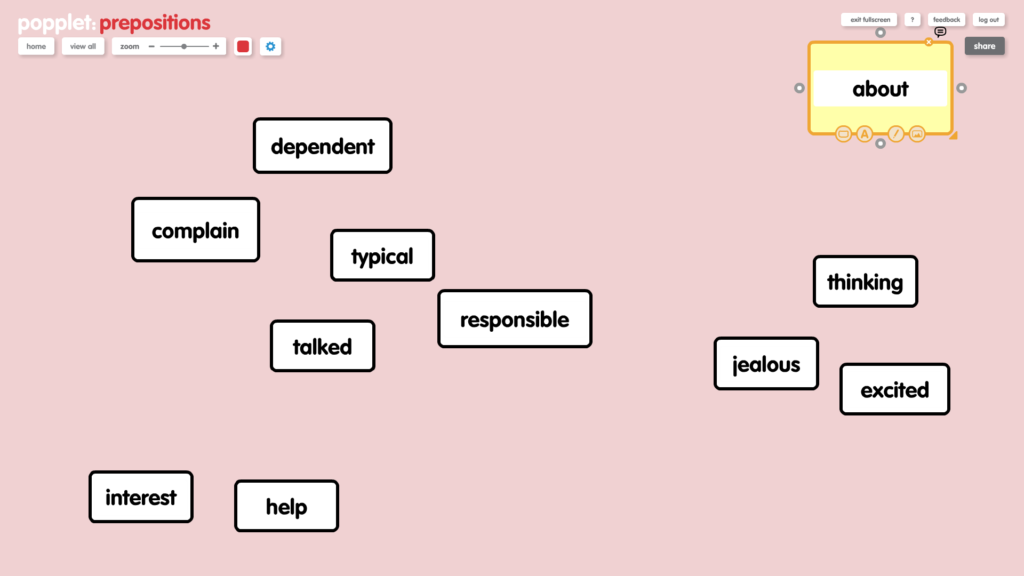
Note that only the top popple is visible, but if you have selected correctly then all the selected popples will be underneath. How to view them? First, we need to take a look at the make row and make column tools.
Unlocking a Popple Stack
Before we can free our popples from the popple stack, we need to find out about the make row/column tools.
MAKE ROW
- First, select the popples you want to form a row (selected popples turn yellow)
- Then click on make row from the cog menu
- The popples shift into a neat, evenly distributed row:

MAKE COLUMN
- First, select the popples you want to form a column (selected popples turn yellow)
- Then click on make column from the cog menu
- The popples shift into a neat, evenly distributed column:
We are almost ready to unlock our popple stack, but first let’s let’s form a column from the words in the Prepositions Popplet: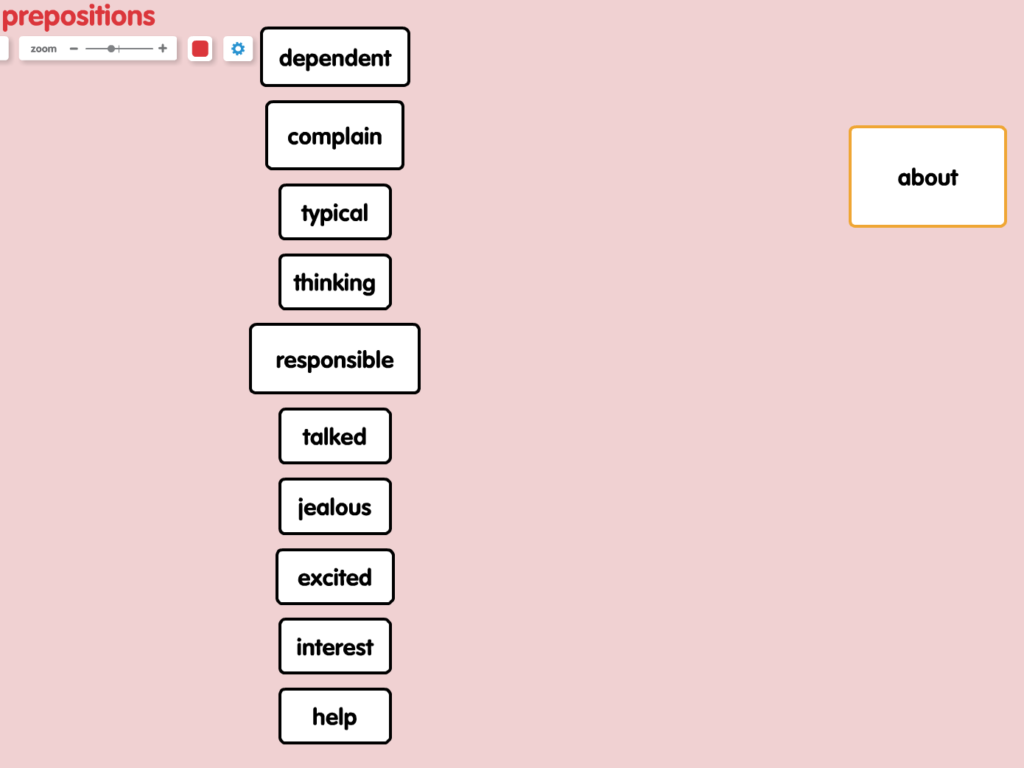
Now that we have a neat column, we want to include the prepositions, which are waiting patiently, out of the way in the corner to do this we need to unlock the popple stack:
- Select the entire popple stack using the click and drag method, making sure the yellow box entirely surrounds the stack
- Check that the top popple is yellow
- Then, click on make column form the cog menu and the stack will separate to form a column of individual popples:
In the above example we have chosen to form a column, but depending on how you want to format the popplet, you can also separate the stack into a row by selecting make row instead of make column.
Now the propositions can be easily matched to the corresponding words to form common expressions like in the finished popplet below:
There is no limit to the number of popple stacks you can make, which is a good thing as there seems to be no limit to the number if ideas that you can have. It’s true that a good popplet doesn’t have to have a high number of popples – some of the best work shared by our community on our Twitter and Facebook page contain but a handful of popples. However, with a little knowledge of popplet formatting techniques, the Popplet canvas, can be as big as you need it to be.
Popplet Formatting Techniques 1: Selecting Popples & Multiple Actions
Popplet Formatting Techniques 3: The Grid Layout
Two Minute Tutorial: Collaborating With Popplet Comments
Two Minute Tutorial: Formatting Popplets in a Grid Layout