Over the last few weeks, we have been looking at how Popplet can be used in Project work – all project work: A school assignment about volcanoes, the implementation of new machinery into a factory, or planning the opening of a coffee shop. No job too big or too small. In this article, we focus on presentations.
Presentations are now an essential part of work and education. They are no longer an activity confined to the realm of experts, and it’s highly unlikely that anybody born in the digital age will be able to avoid having to give one at some point. These days, even Kindergarteners are taught how to present their work.
As you can see from above, it would be fair to say that Popplet boards are the very stuff of presentations. Depending on the stage of your project, if you’re using Popplet, then you will always have a collection of visuals for presentations. But did you know that Popplet comes with its very own built-in presentation tools?
Along with Popplet’s own features, there are also a few other ideas for delivering presentations using Popplet:
- Popplet Presentation Mode
- Popplet Presentation Mode 2
- The Popplet Timewarp Feature
- Slideshows using Google Slides, PowerPoint, Keynote…
- Videos, screencasting…
Popplet Presentation Modes
Popplet has two “presentations modes” and everything you need to give the perfect Popplet presentation can be found in the view menu on a popplet. Just open the popplet you want to present, click on the cog menu (1), then select view (2) and you’ll see three options (3):
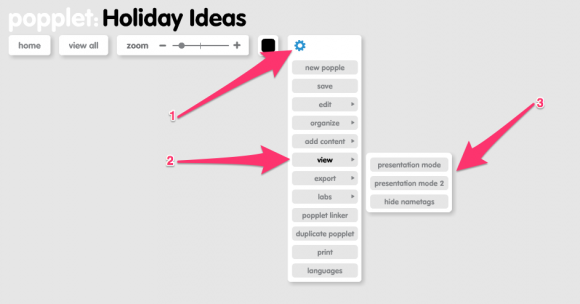
- Presentation mode – display each and any popple, one at a time, in any order you choose
- Presentation mode 2 – display multiple popplets in the same frame
- Hide nametags – useful for collaborative work as you can choose to display individual contributions or not
Popplet Presentation Mode
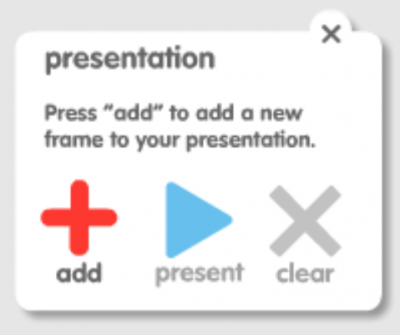
- Begin by selecting presentation mode to activate it, and the presentation pop up window will appear in the bottom left-hand corner of the popplet:
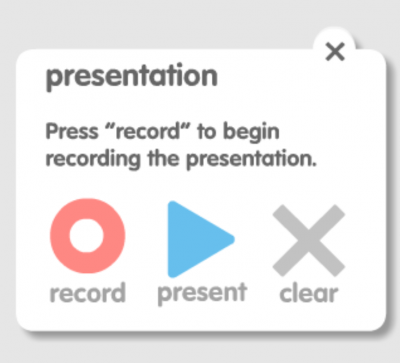
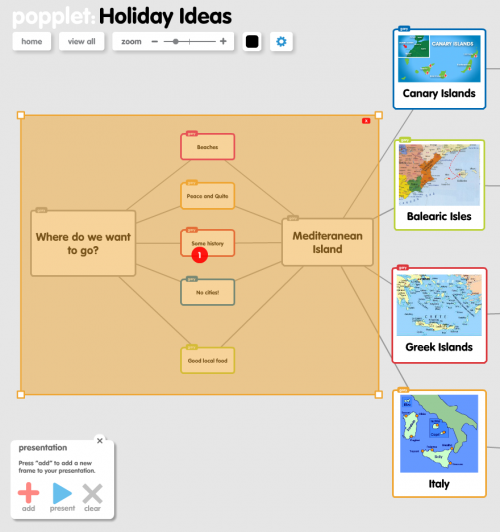
- Next, click on the red record button and select the popples that you want to display, in the order you want to display them as in the Holiday Ideas popplet below:
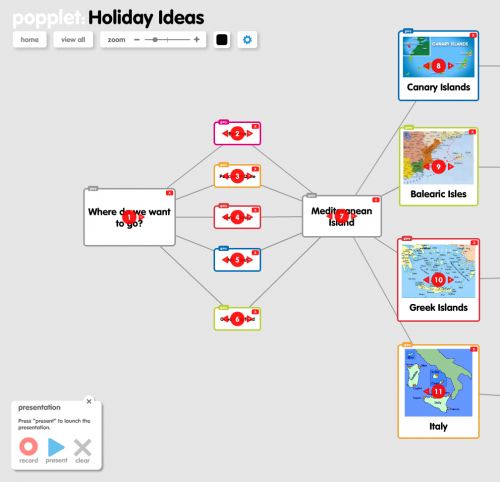
- To begin your presentation select present from the pop-up window. Control the presentation using the arrow keys: up/down to zoom in and out, left/right to navigate between popples:

- Exit the presentation by clicking exit in the bottom right-hand corner of the screen
- Close the pop-up window to exit popplet presentation mode. The presentation will be saved automatically for the next time presentation mode is activated. If you don’t want to save the presentation, select clear from the pop-up window, and Popplet will forget it.

Popplet Presentation Mode 2
- Activate presentation mode 2 by selecting it, and a (slightly different from above) presentation pop up window will appear in the bottom left-hand corner of the popplet:
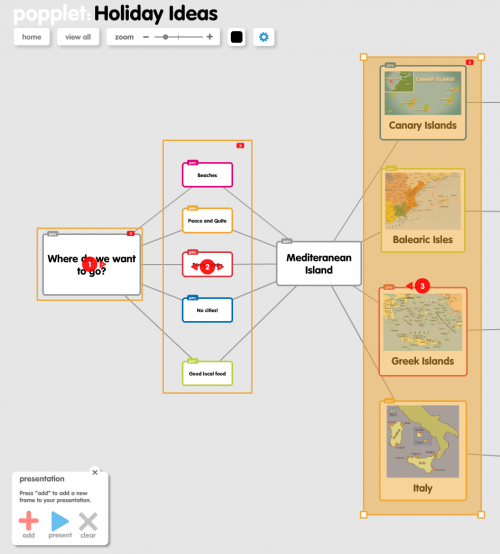
- Next, click add, and an opaque orange square will appear. Drag over the popples you wish to include in a single slide:
- When you’re satisfied with your selection, click add to repeat the process, selecting more slides in numerical order as in the popplet below:
- To begin your presentation select present from the pop-up window. Control the presentation using the arrow keys: up/down to zoom in and out, left/right to navigate between popples.
- Exit the presentation by clicking exit in the bottom right-hand corner of the screen
- Close the pop-up window to exit popplet presentation mode 2. Your presentation will be saved automatically for the next time presentation mode 2 is activated. If you don’t want to save the presentation, select clear from the pop-up window and Popplet will forget it.
The Popplet Timewarp Feature
The Timewarp Tool, as you may have guessed, is a record of the evolution of a Popplet from start to finish. Timewarp allows you to access snapshots of any popplet you have created. You can click on these snapshots in any order, returning as many times as you like to any of them during a presentation. Timewarp also has a video-like feature with stop/start buttons.
Accessing The Timewarp Tool
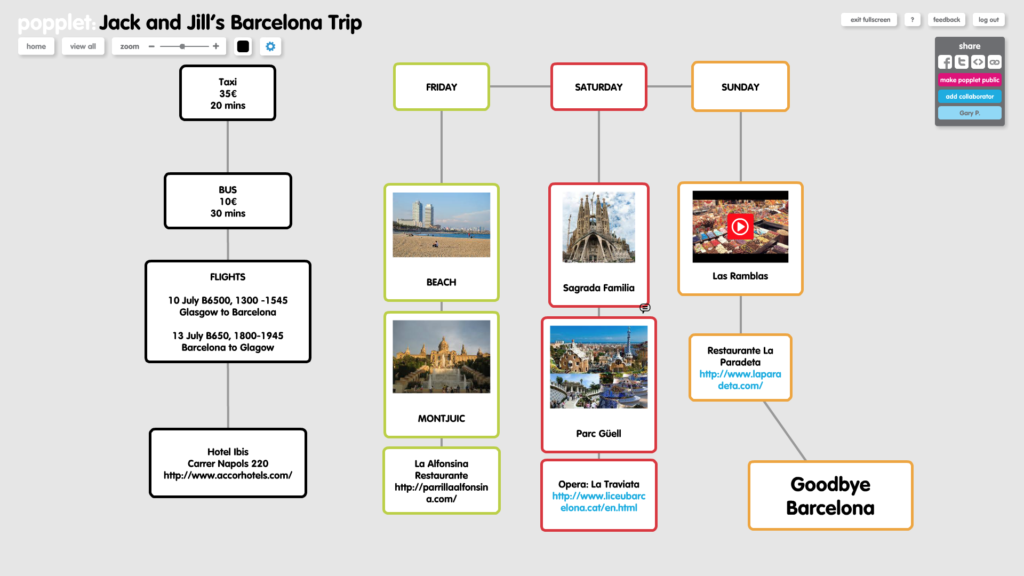
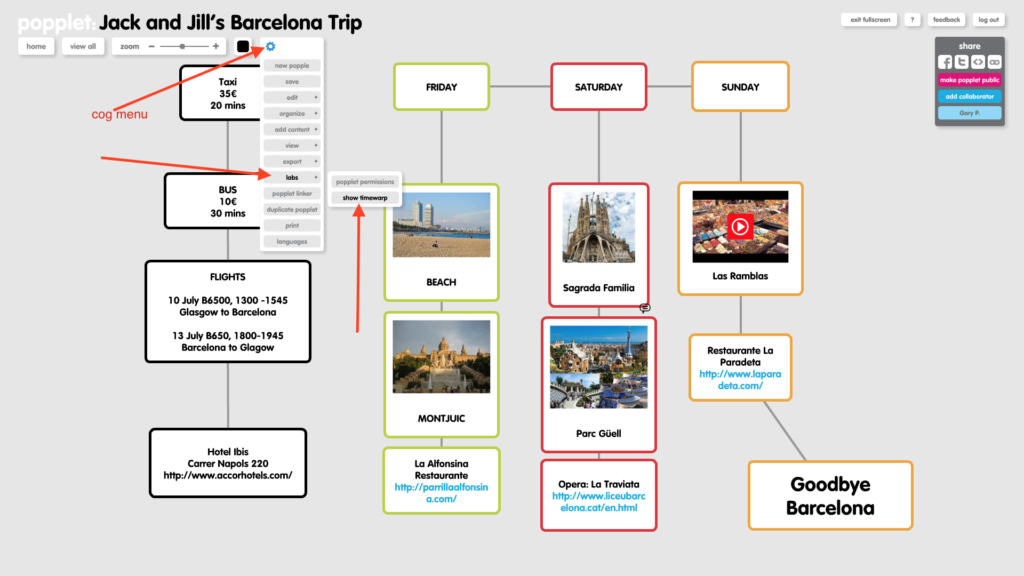
- Choose a popplet, any popplet that you want to present from the dashboard. We’re using Jack and Jill’s Barcelona Trip as an example:
- Next, click on the blue cog menu, select labs, then choose show timewarp from the dropdown menus:
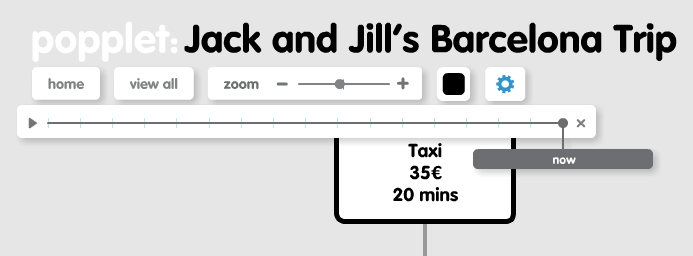
- Timewarp will now be activated and you should be able to see the Timewarp Bar in the top left-hand corner of the popplet:
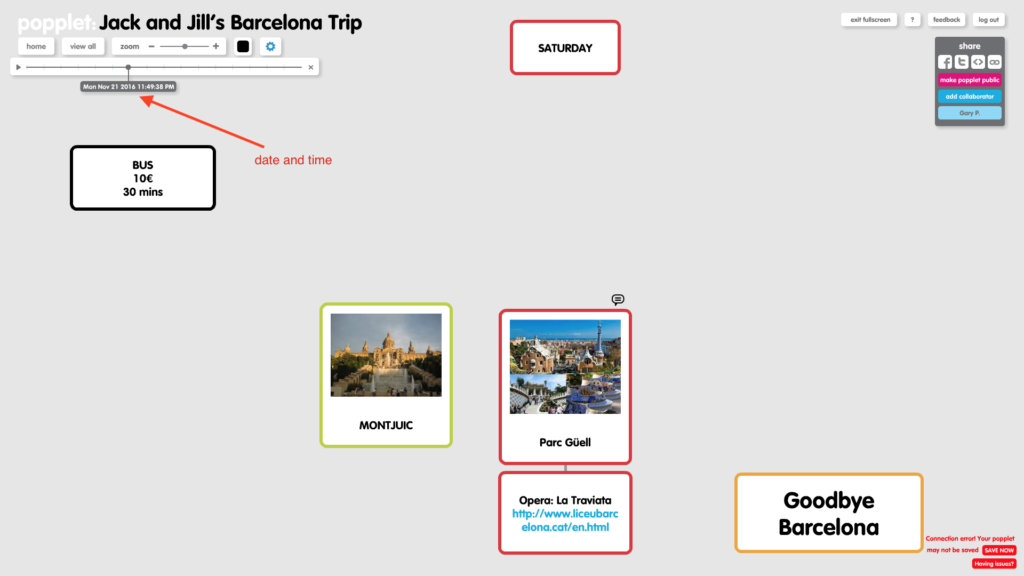
- Note that when Timewarp is active, a warning message appears in the bottom right-hand corner of the popplet. Don’t worry, it’s a result of autosave being deactivated and you can ignore it:

How to Use The Timewarp Tool For Presentations
There are three ways to use the Timewarp Tool:
- The Timewarp Bar has 17 different points. The first point is always the blank popplet and the final point (now) is always the most current completed version. Clicking on any of the fifteen points in between reveals a snapshot of a popplet’s evolution and includes the date and time it was created:
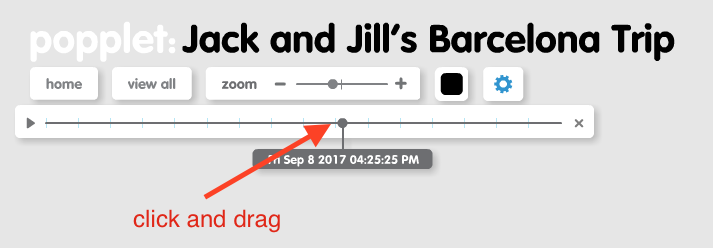
- Scanning: Click and drag the little circle that indicates a point on the timeline and drag it back and forward to search the popplet to navigate:
- Video View: Watch the evolution of the whole popplet. This is a very useful presentation tool. Click the start arrow as you would on any video and pause whenever required. Here’s what Jack and Jill were thinking as they planned their Barcelona trip:
Google Slides, PowerPoint, Keynote…
If your popplet is a part of a presentation that contains other information or if you need to present multiple popplets then an alternative way to do this is to use another presentation tool such as Google Slides, PowerPoint, Keynote…. Popplets can be downloaded directly as images or as screenshots and uploaded to presentations created using other applications.
Videos and Screencasting
Quite often, especially when creating tutorials, educators choose to Screencast. This simply means that they make a recording (capture) of their computer’s/device’s screen. A quick “Popplet” search on Google will reveal thousands of Popplet videos that have been created this way. Here’s one about Popplet Lite:
Have we missed anything? Are you delivering presentations with the method discussed above or are you using a different technique? One thing we know is that when it comes to Popplet, there are always new ideas in the pipeline. It’s these new ideas that are the key to Popplet’s success.
Join us and share with the Popplet community on Twitter and on our Facebook page. Go to the Popplet homepage, and if you haven’t done so already, sign up for a Popplet account and get ten complimentary Popplet boards
This is one article in a series of four. Click below to read the other three:
Project Popplet1: Research Tools
Project Popplet 2: Data Management
Project Popplet 3: Creating Visuals and Infographics