So, you’ve had a few ideas and your screen is starting to look a little bit cluttered. Like your thoughts, it’s time to get your popples in order. Maybe you are seeking fresh perspective, just cleaning house or perhaps you feel that your creation is approaching completion: whatever the reason, Popplet’s Organize Menu contains the tools to bring unruly popples into line.
Popplet’s Organize Menu is found by clicking on the cog menu, then organize as shown below. A list containing all the organizing tools appears:
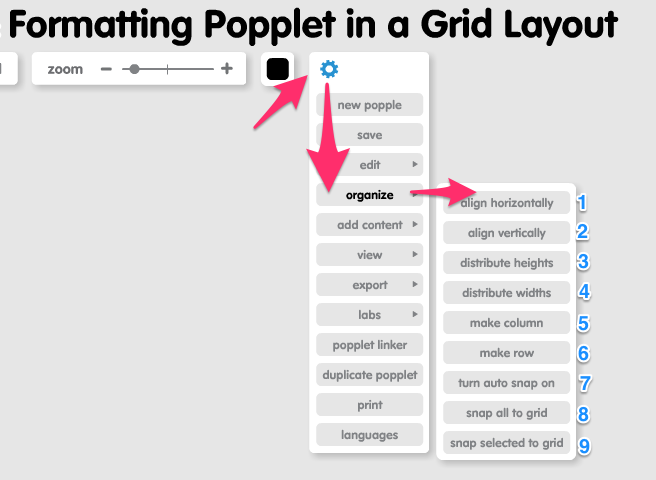
Here’s how all these functions work:
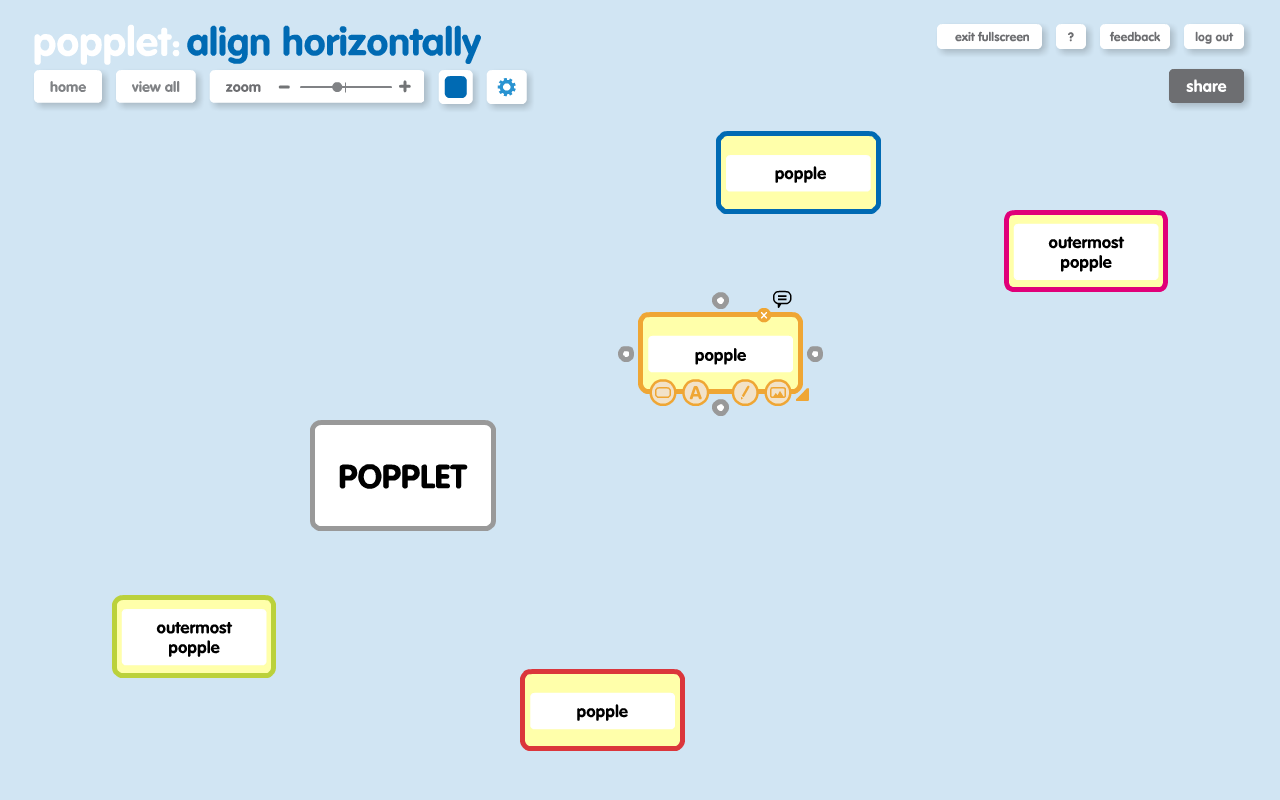
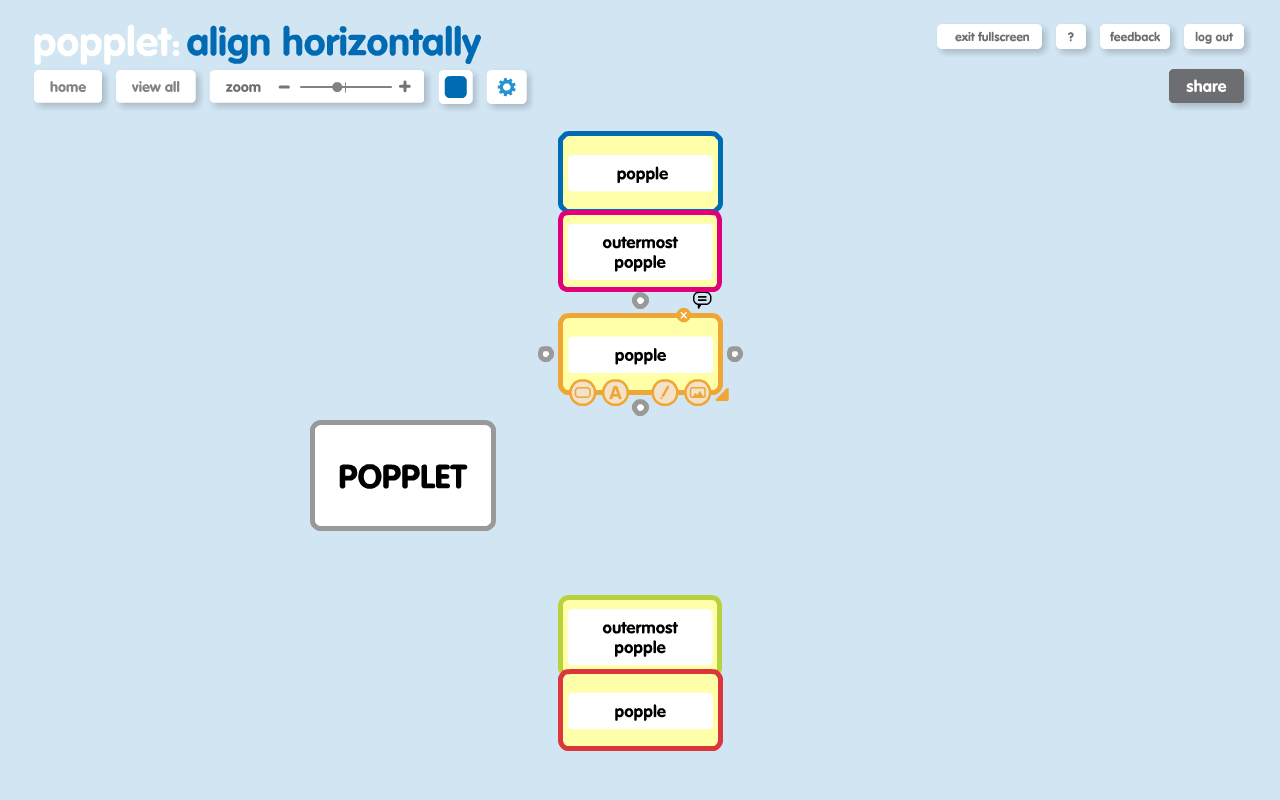
1. Align horizontally
Select popples, then click align horizontally. Popples pull together in a horizontal direction forming a neat symmetrical stack, centered midway between the two outermost popples selected. Vertical distances between popples don’t change.
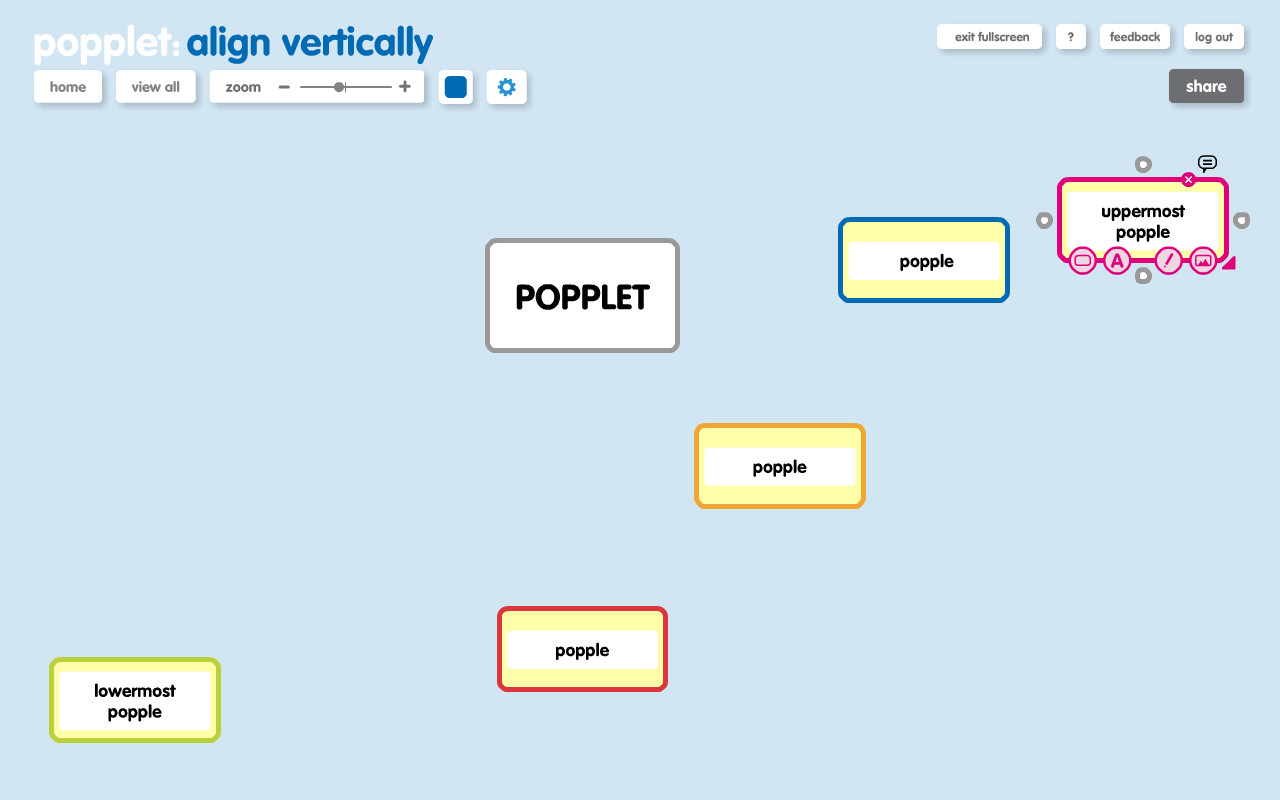
2. align vertically
Select popples, then click align vertically. Popples pull together in a vertical direction forming a neat symmetrical tier, centered between the “uppermost popple” and the “lowermost popple” selected. Horizontal distances between popples don’t change.

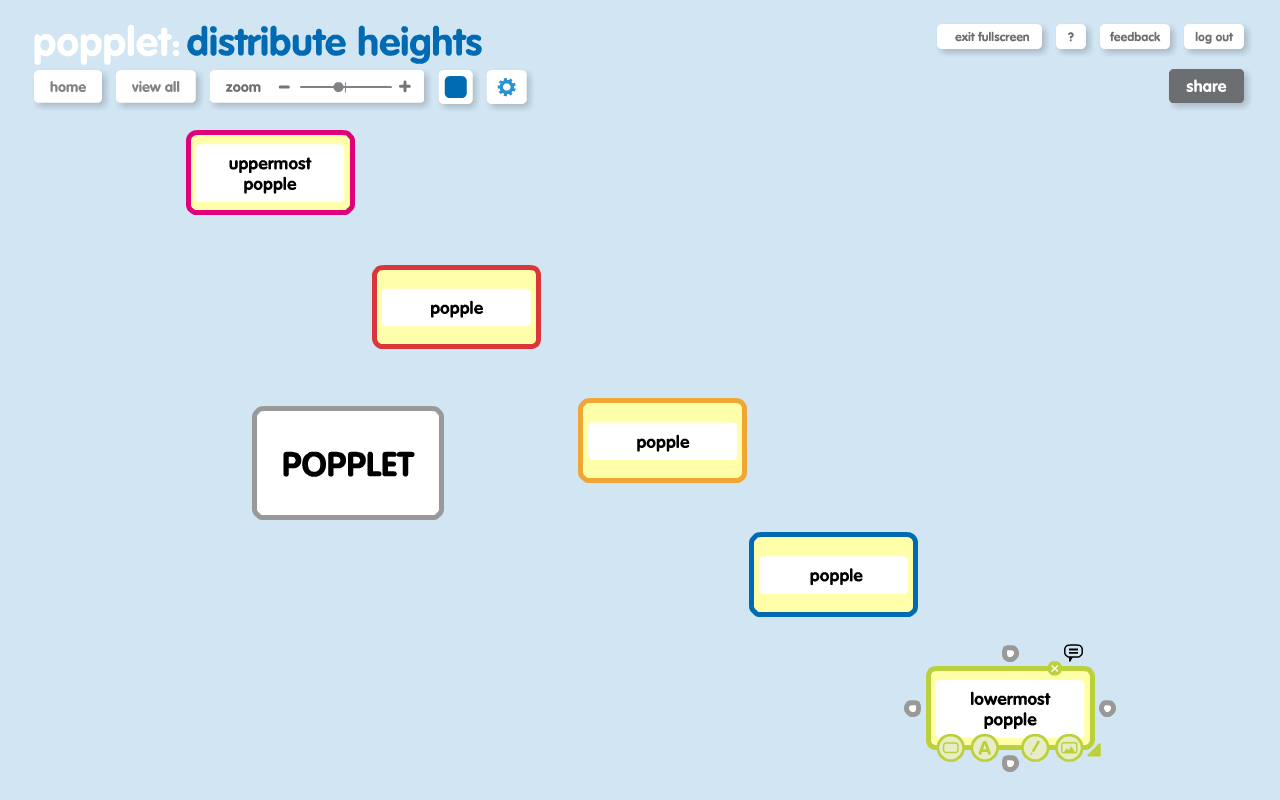
3. distribute heights
Select popples, then choose distribute heights. Popples arrange themselves until they are equal distances apart, from top to bottom. The “uppermost popple” and “lowermost popple” selected remain stationary.

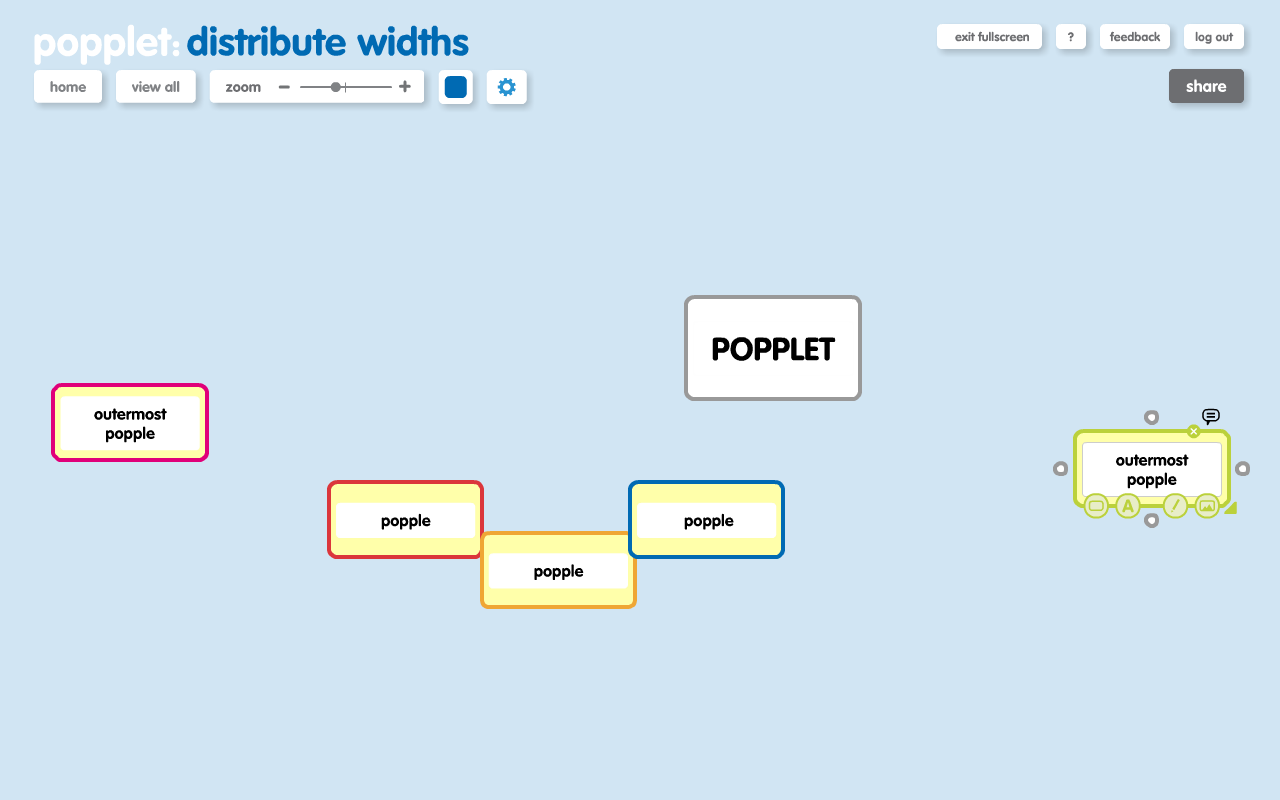
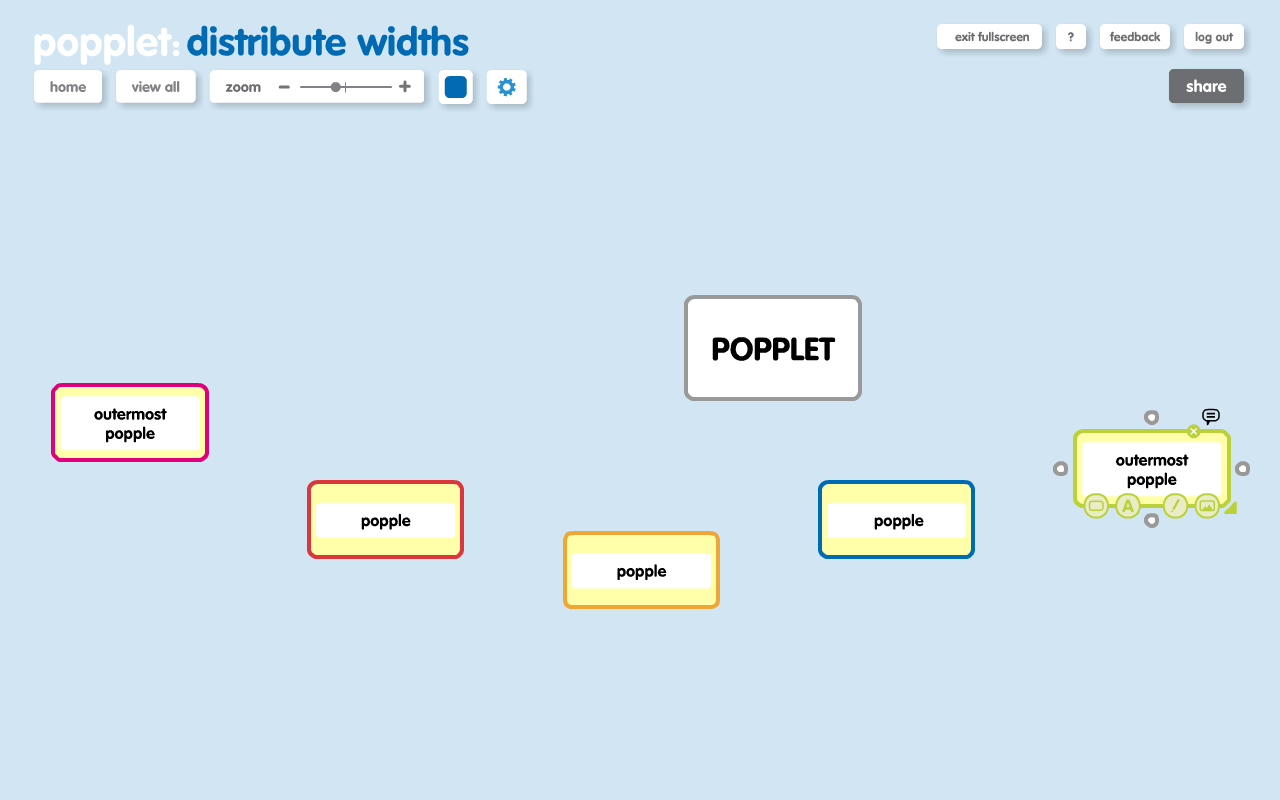
4. distribute widths
Select popples, then choose distribute widths. Popples arrange themselves until they are horizontally equidistant (i.e. they are equal distances apart from left to right). The two “outermost popples” (furthest to the left and right) remain stationary.
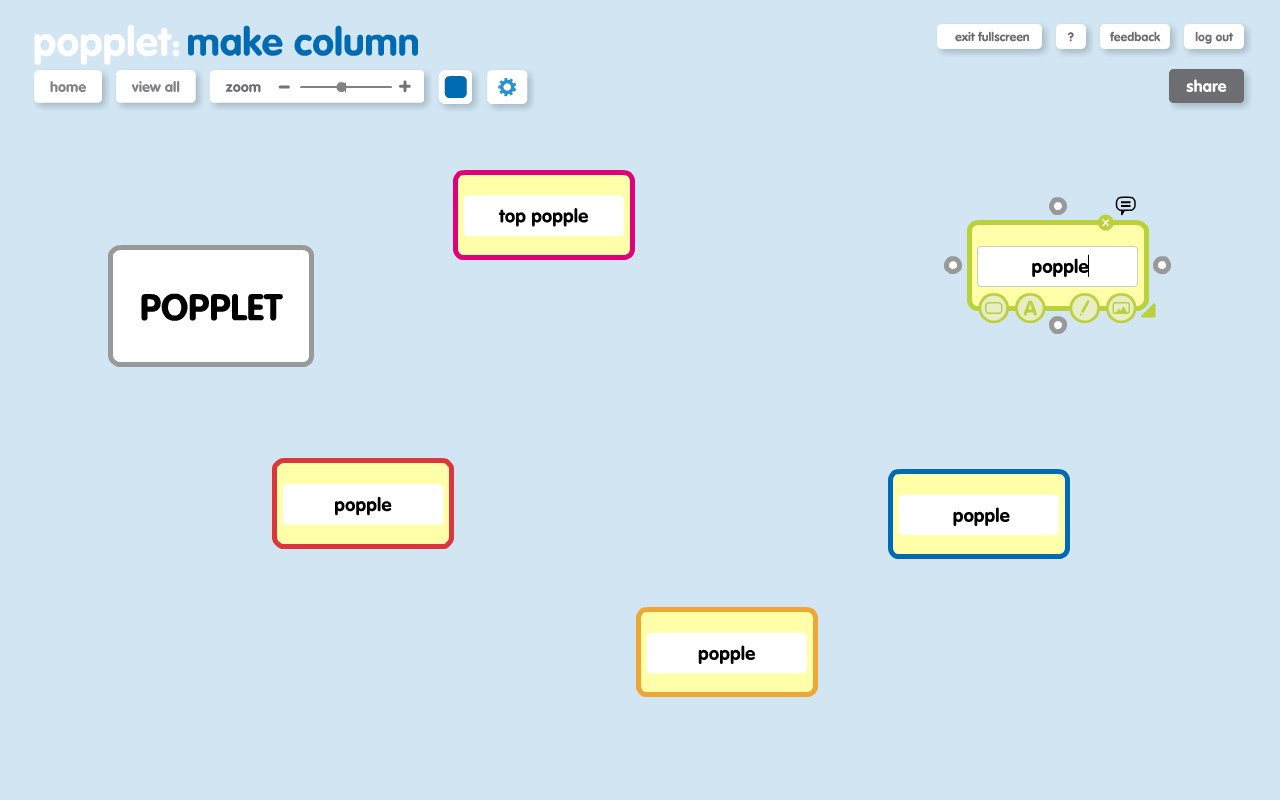
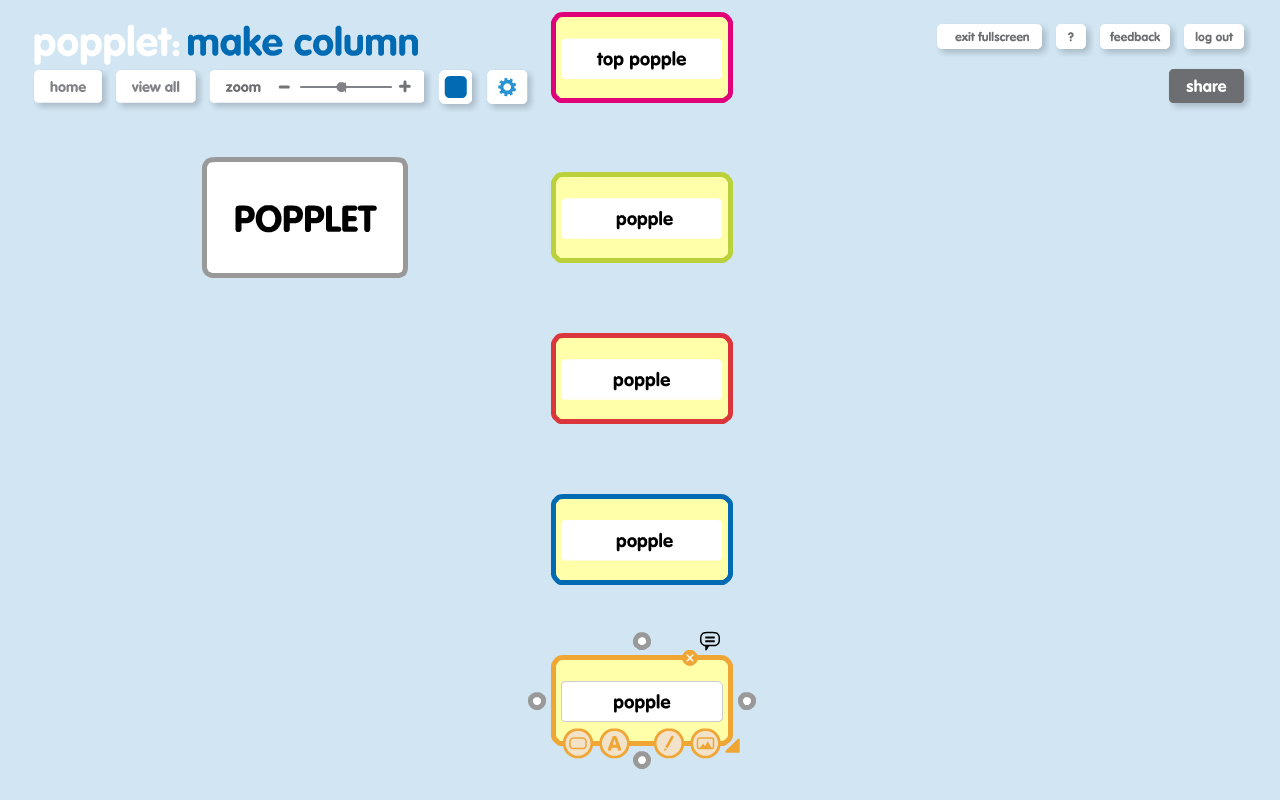
5. make column
Select popples, then choose make column. Popples form a neat symmetrical column below the “top popple” selected. Popples become vertically equidistant.
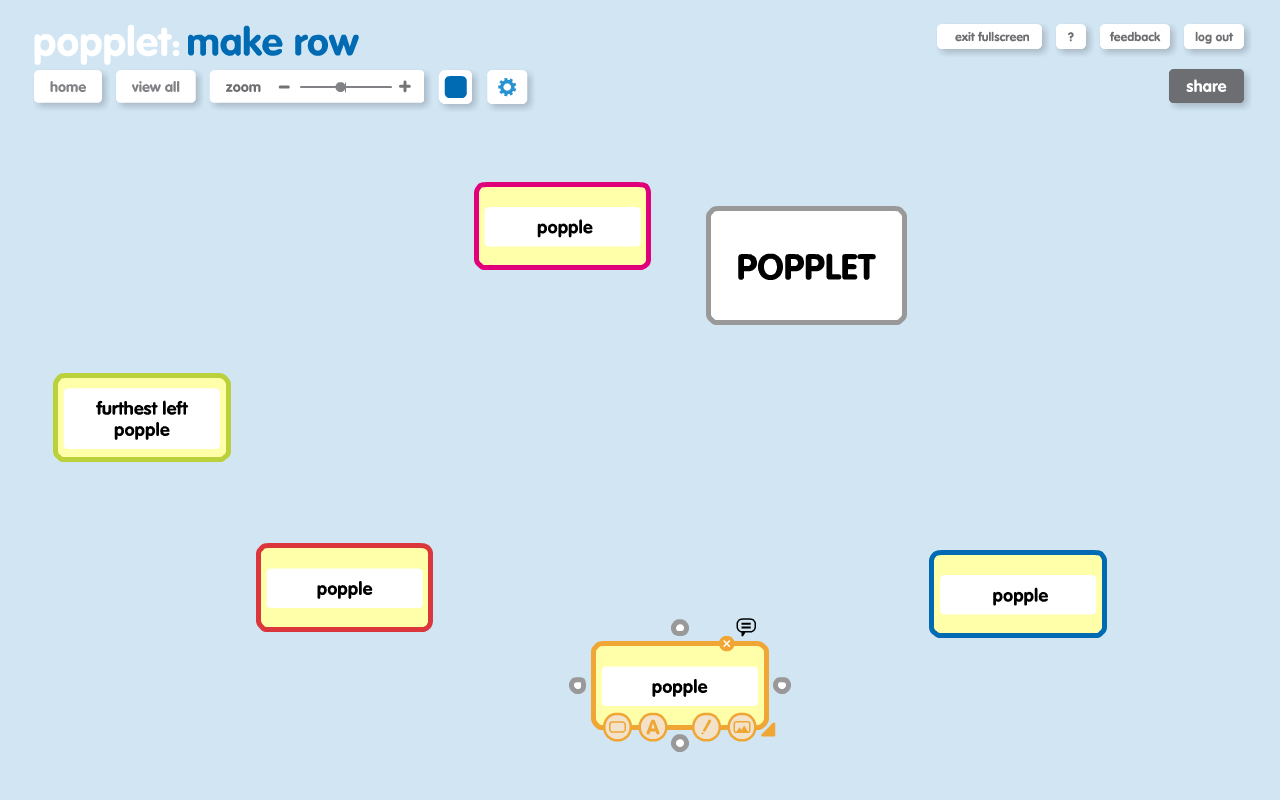
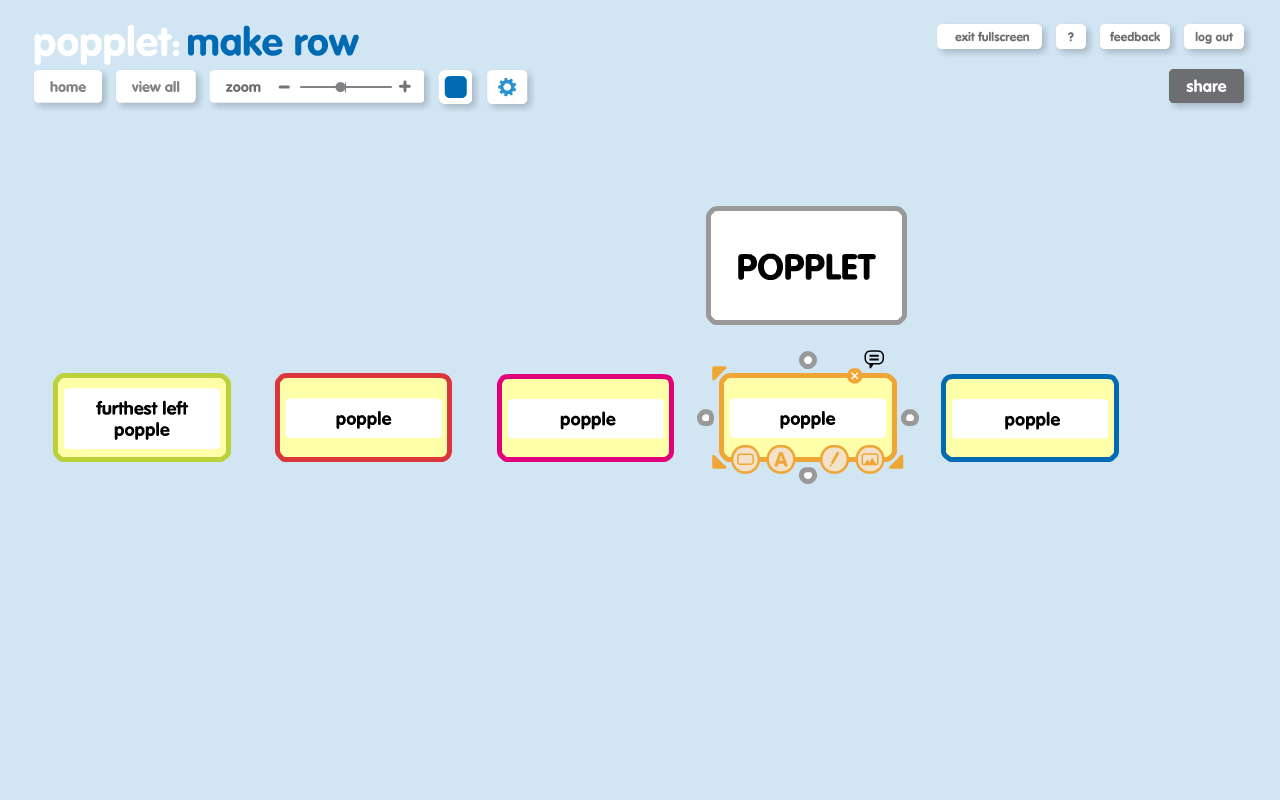
6. make row
Select popples, then choose make row. Popples form a neat symmetrical row to the right of the “furthest left” popple”. Popples become horizontally equidistant.
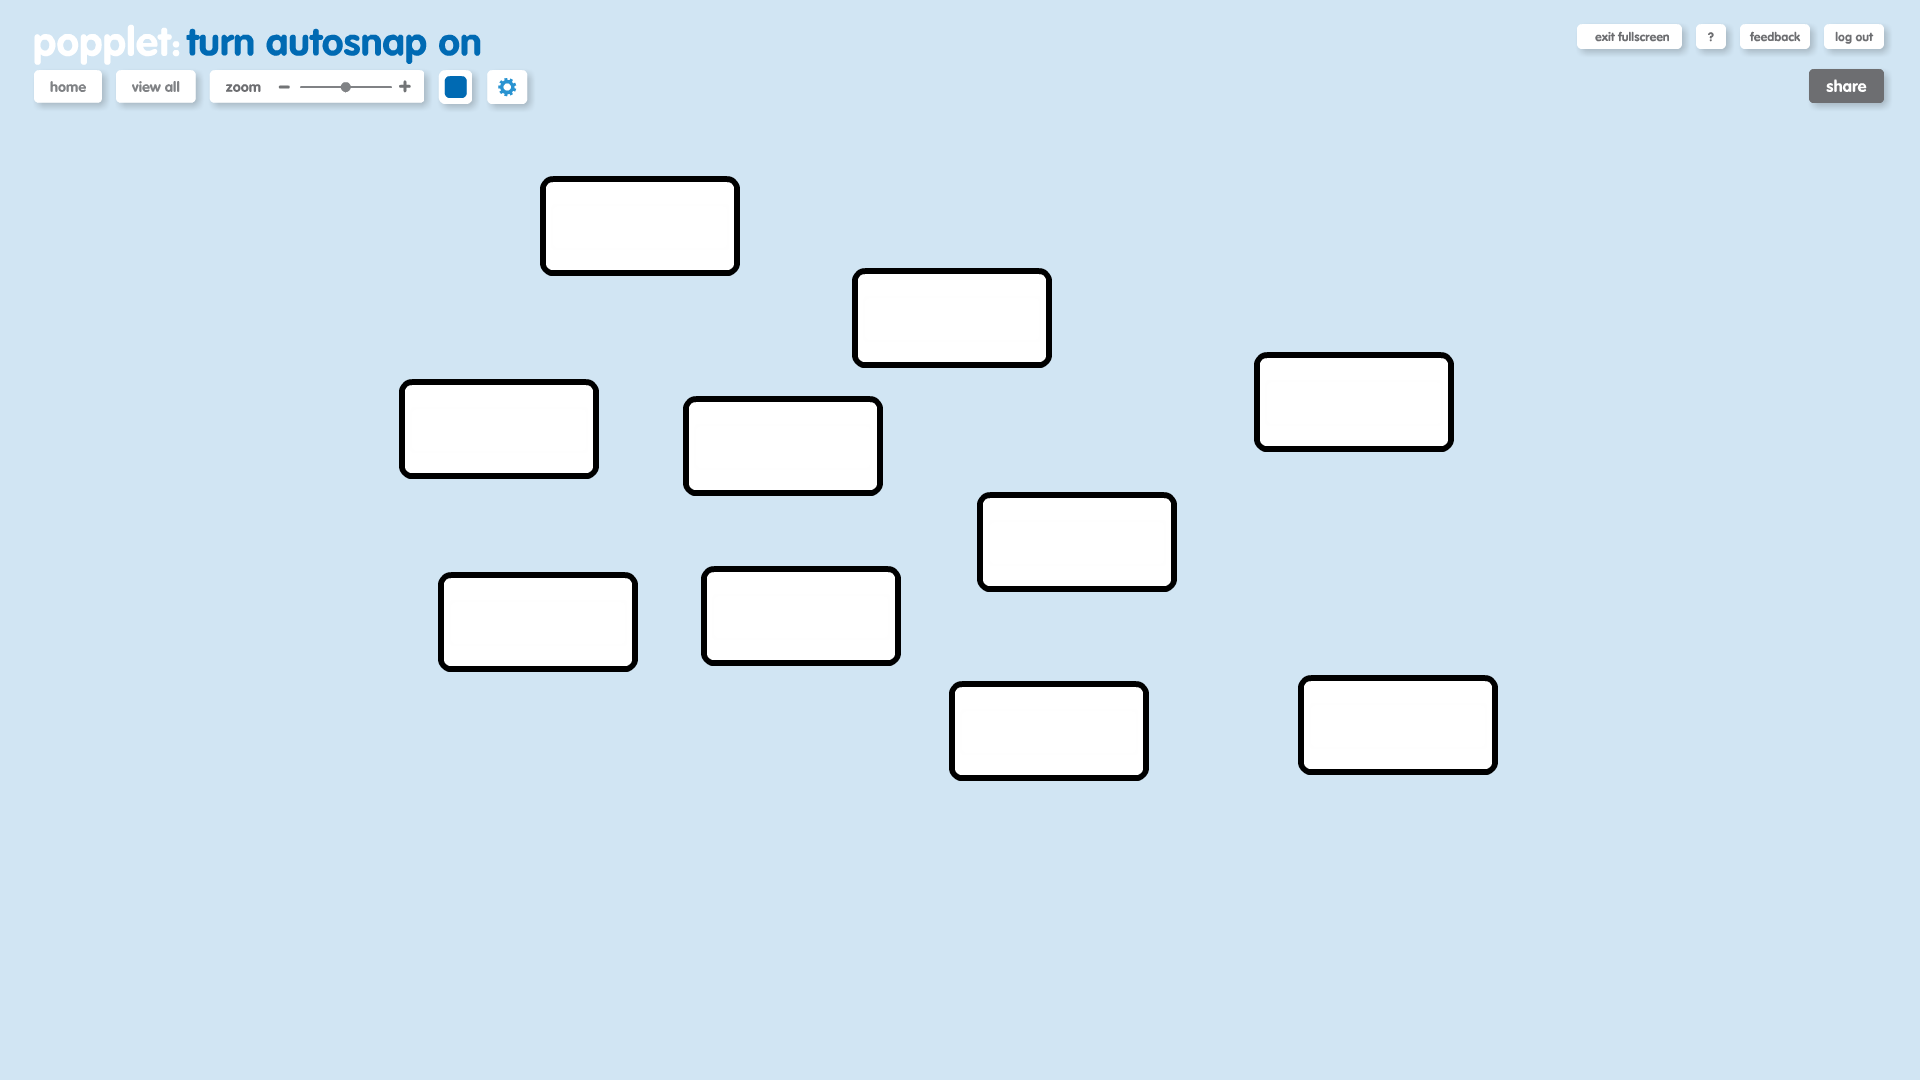
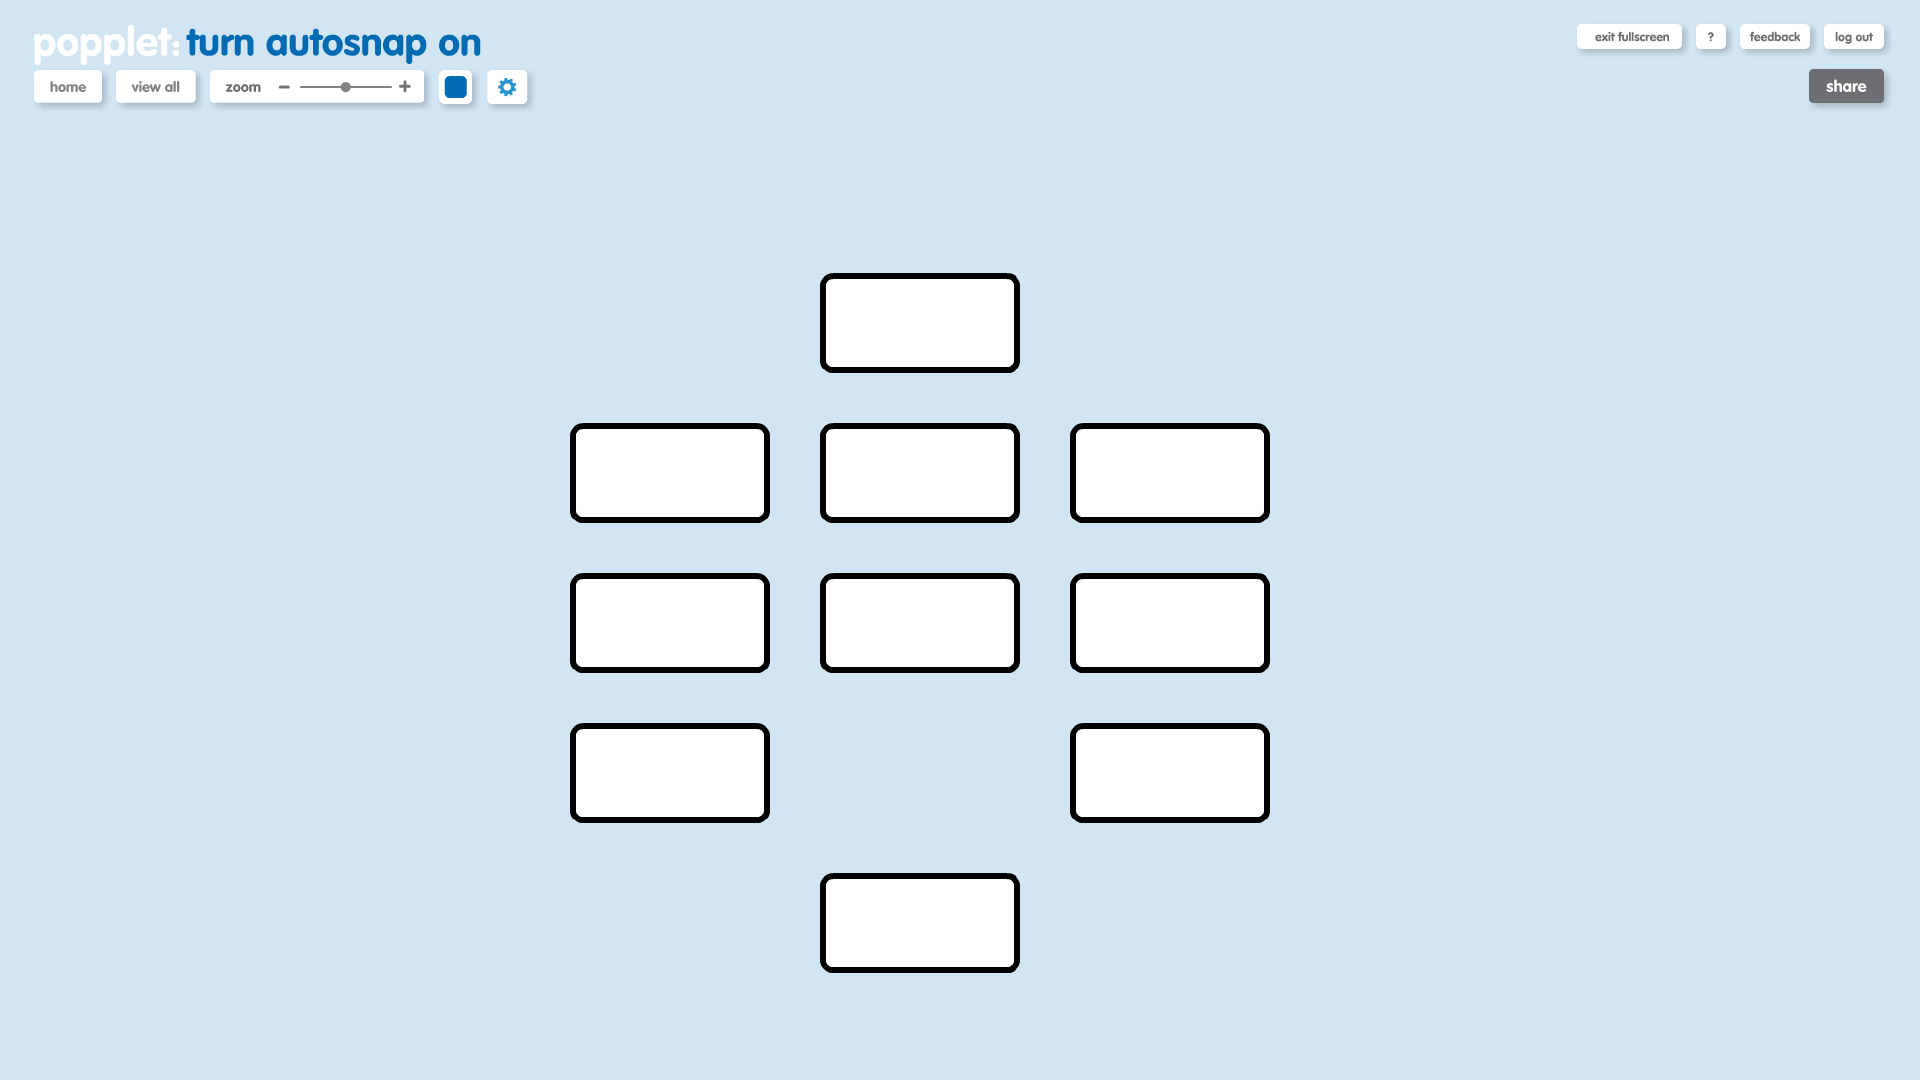
7. turn autosnap on
Popples are automatically aligned in a grid format. Forming rows and columns. For example, see below the difference when creating popplets with this feature off then on.
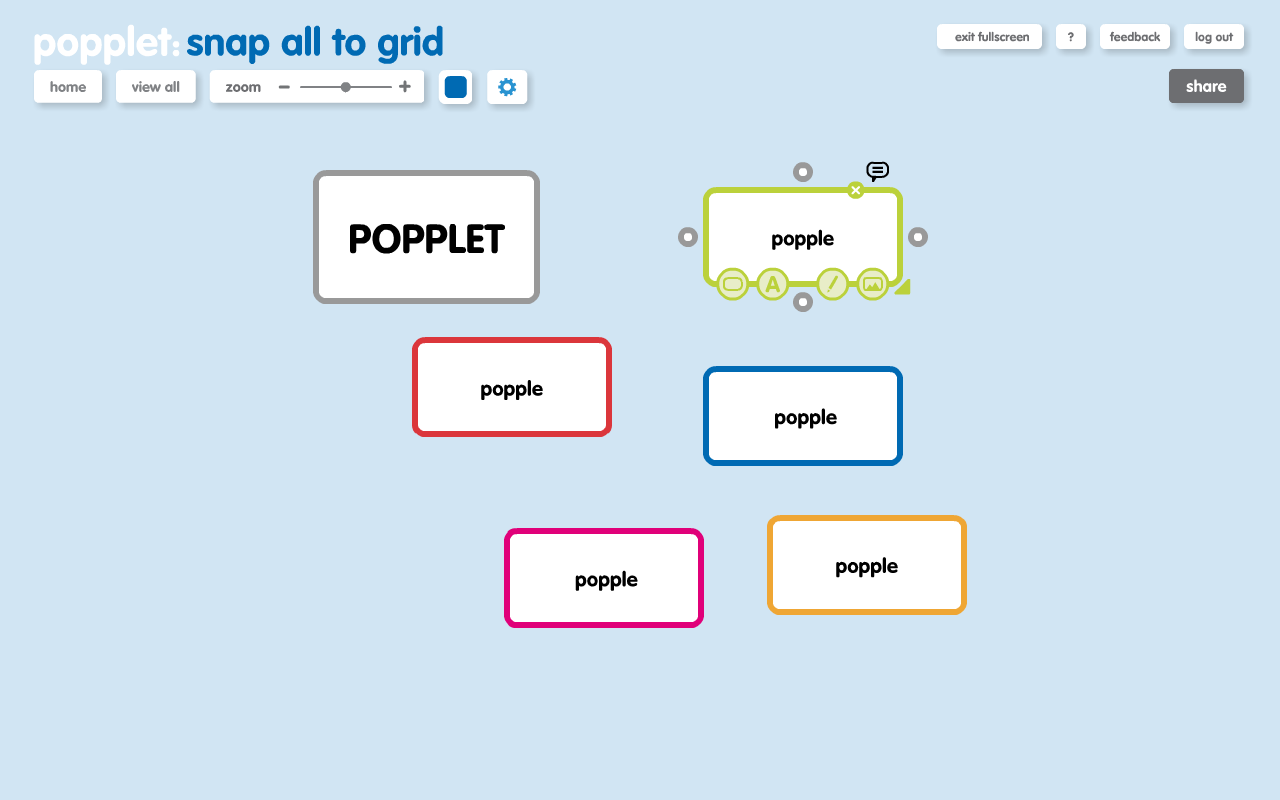
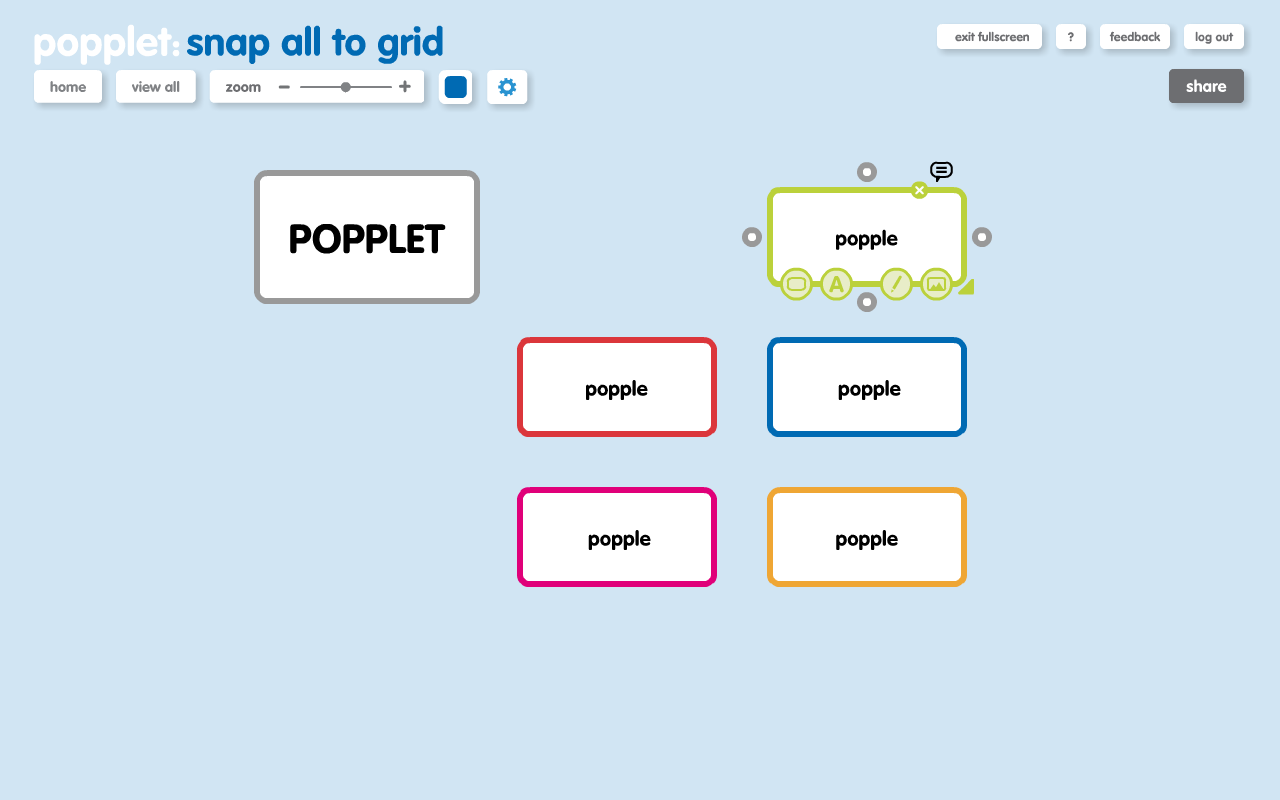
8. snap all to grid
All popples snap to a grid format (like above) forming rows and columns.
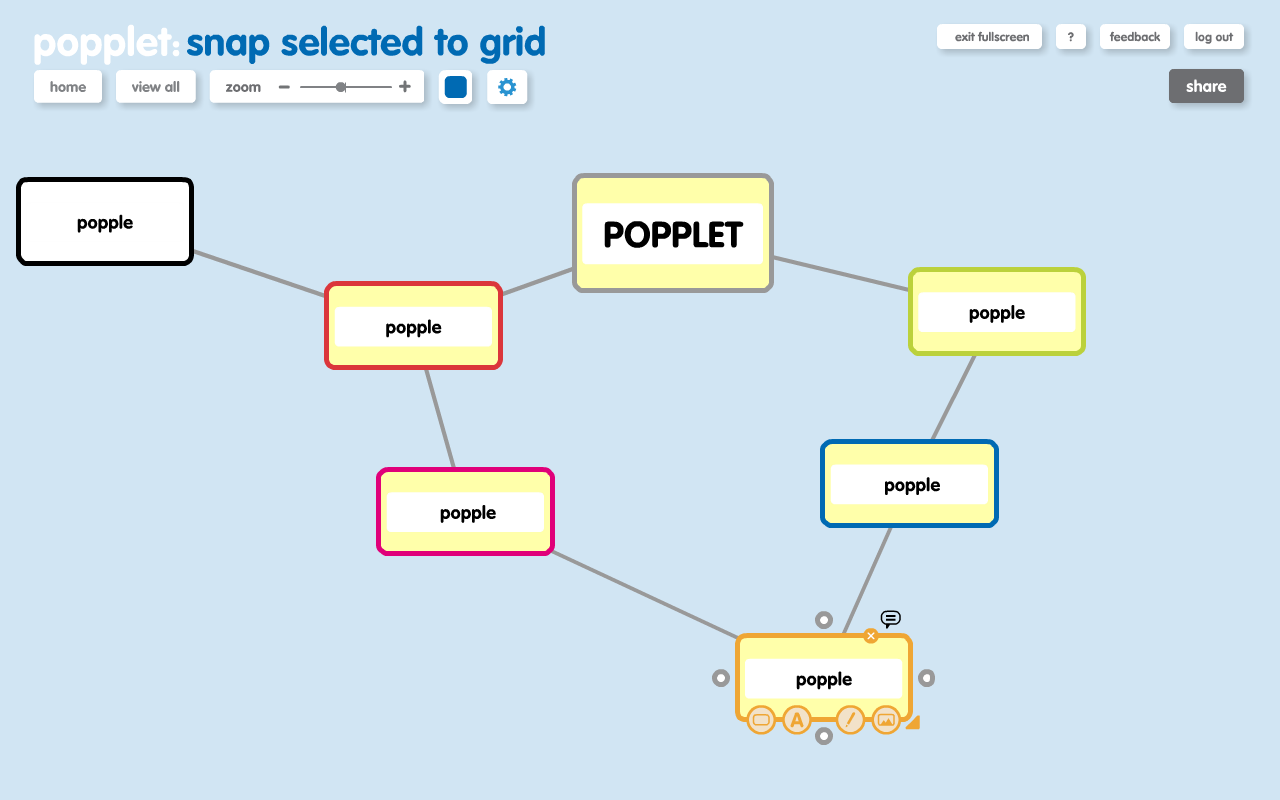
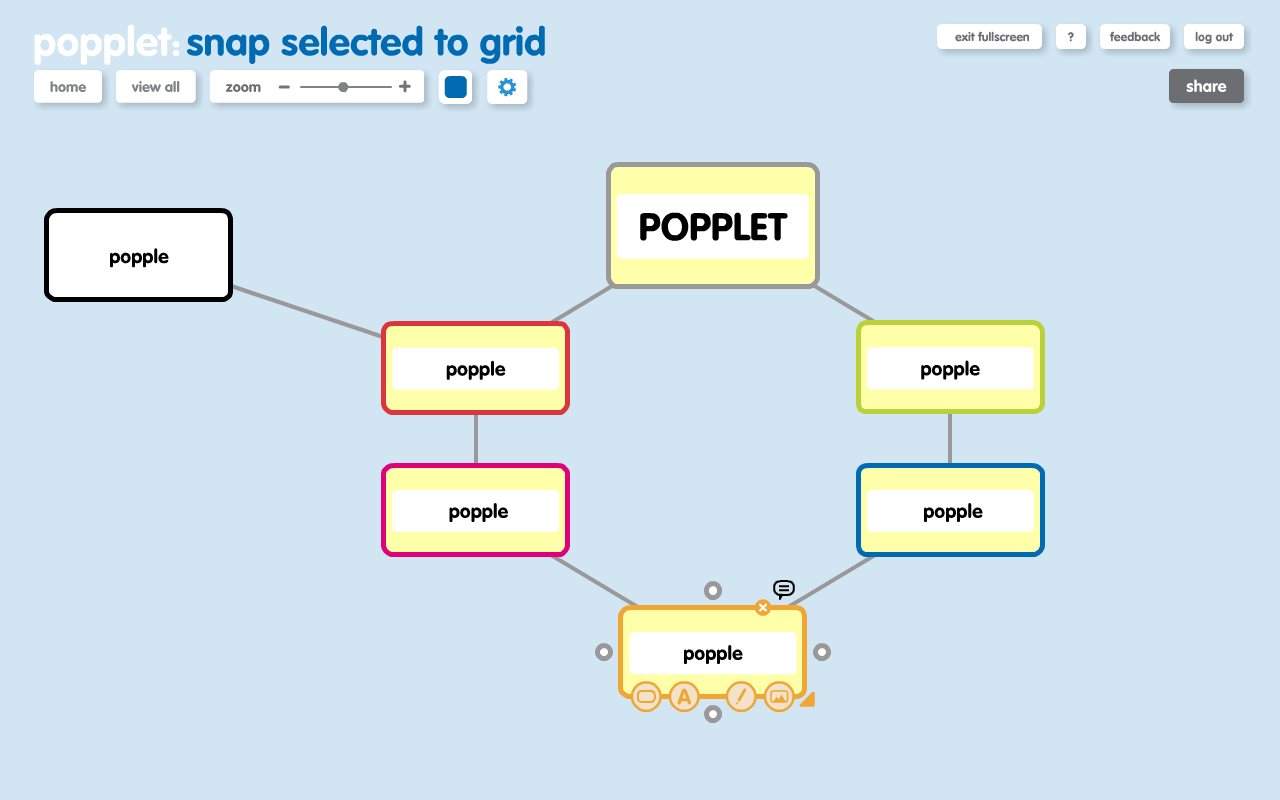
9. snap selected to grid
Selected popples snap to a grid format forming rows and columns.
Additional Information
- Hover the cursor over any popple you want to select, press shift and click. To select mutiple popples hold down shift while clicking on the ones you want to select. Selected popples turn yellow. To deselect popples, click anywhere on the screen.
- To reduce more clutter, you can also hide nametags by selecting “view” from the cog menu, then “hide nametags”. We suggest you only do this if you are not going to collaborate on your popplet with others.
- Once finished, Popplets can be saved as high resolution images which are useful for presentations: Saving Popplets in High Resolution
- For large popplets with lots of notes, for example, when doing revision of a subject, Snap to grid is particularly useful (and remember to have a look at our Revision Techniques ideas!)
- Snap to grid is also great for making timelines, in a history project or business plan for example, as Sean Junkins has done.
Was this helpful? We thought so, but the best way to learn these features is by experimenting yourself, so don’t hesitate to try out what you have learned! How do you organize your popples? Share your experiences with us, and our community on Twitter and on our Facebook page.